Shifts Tab
Overview
The shifts tab is used to view and manage the shifts either created by the employers using the Employers application or by the admin users.
The shifts tab can be accessed by clicking on the Shifts tab on the employer details page.
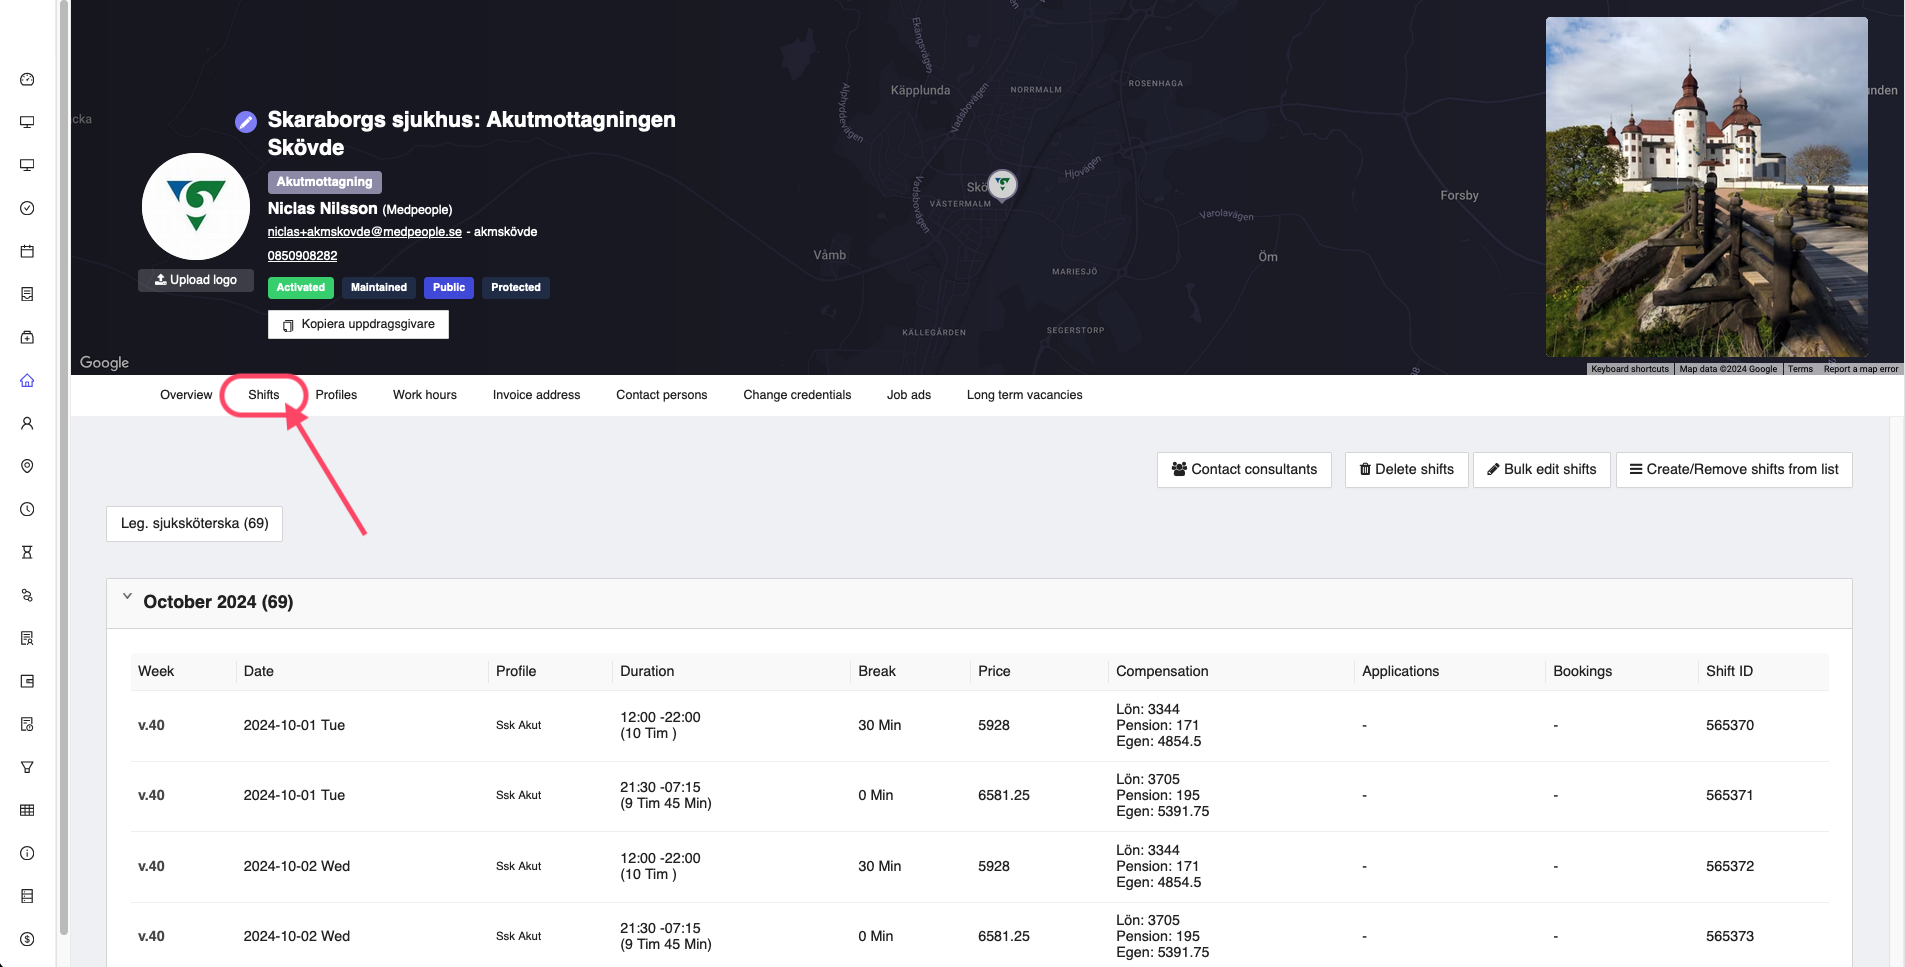
Figure 1: Employer shifts tab
Add Shift
If you have created a new employer, you won't be able to see any shifts in the shifts tab. You can create a new shift by clicking on the Create/Remove shifts from list button on the top right corner of the shifts tab.
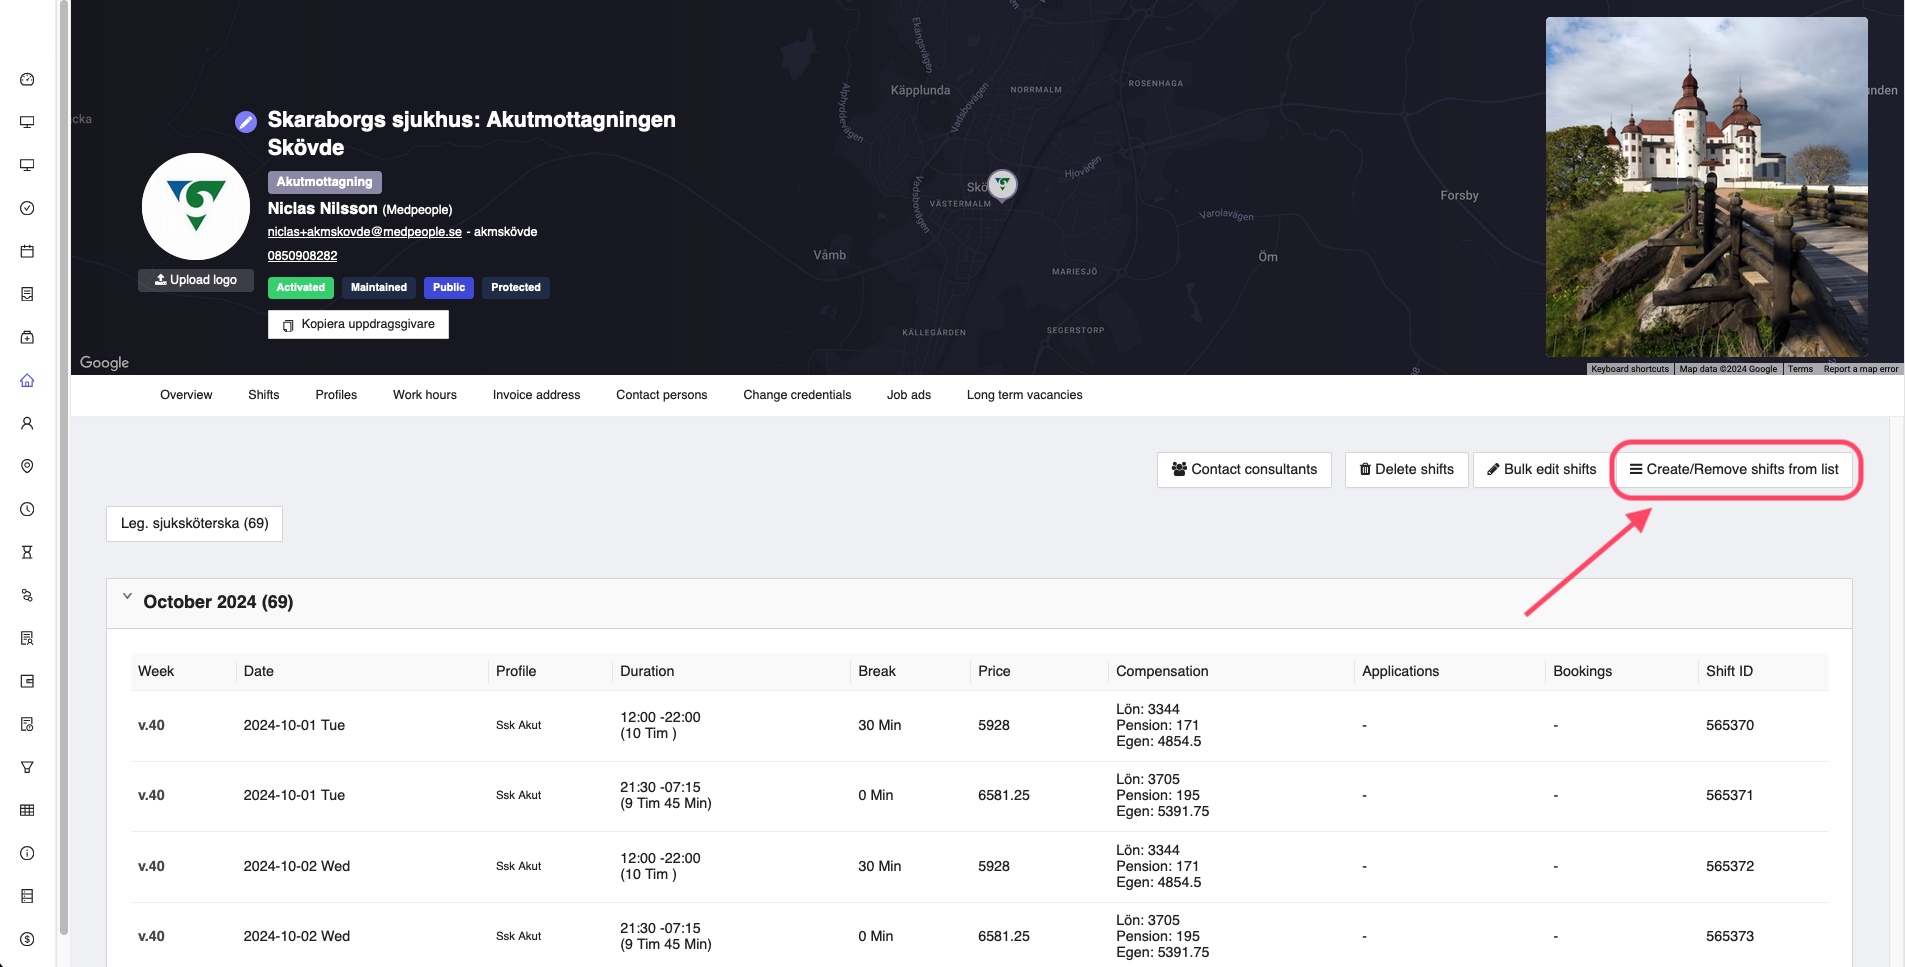
Figure 2: Add shift
This will open a window where you can add the shift details, such as the shift date, the shift duration, the break time, the price of the shift, the compensation, etc. and publish one or more shift ads for the users to apply.
In the window, you have two options to add a new shift. You can click on Add dates button which opens up a window to select the dates you want to post the shifts for. Or you can click on the Add shifts from list button to add a list of shifts from an excel file that you are provided with from the employer side.
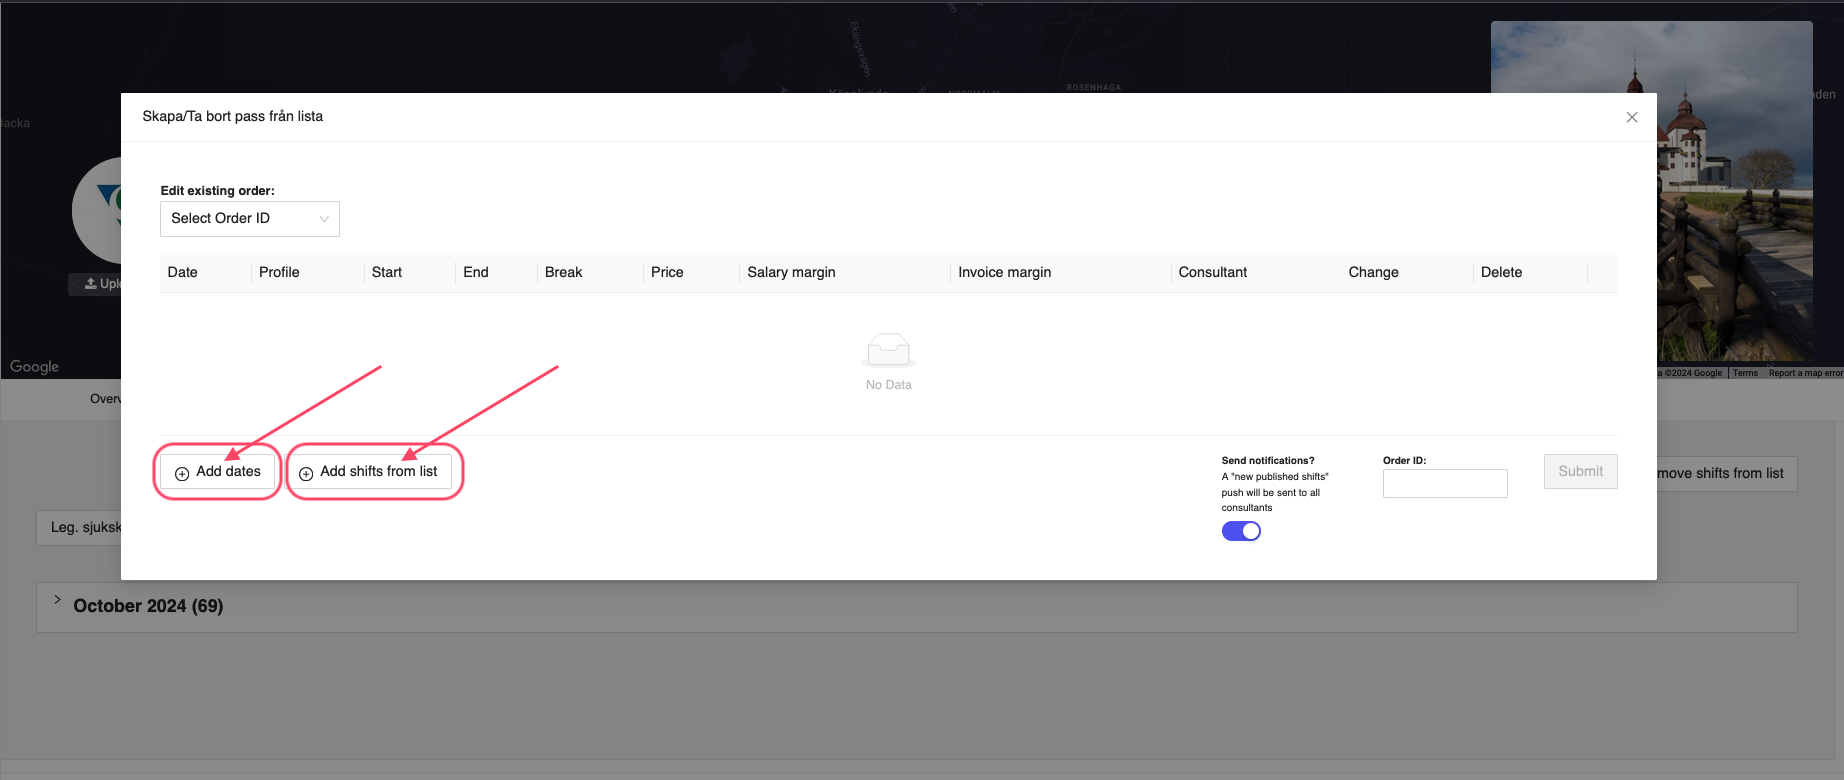
Figure 3: Add shift window
Add dates
When you click on the Add dates button, you will get a windows where you can select the dates for which you want to post the shifts for. You can select the dates by clicking on the dates in the calendar. Once you select the dates, you can click on any part of the window to add the shifts for the selected dates.

Figure 4: Select shift dates
This will show the selected shifts in the shifts tab as shown in the Figure 5 below.
Now you have the ability to modify the selected shifts based on the requirements such as profile, starting time, ending time, breaks allocated, hourly price, salary margin, invoice margin etc. and if you want, you can also add the consultant directly to the shift.
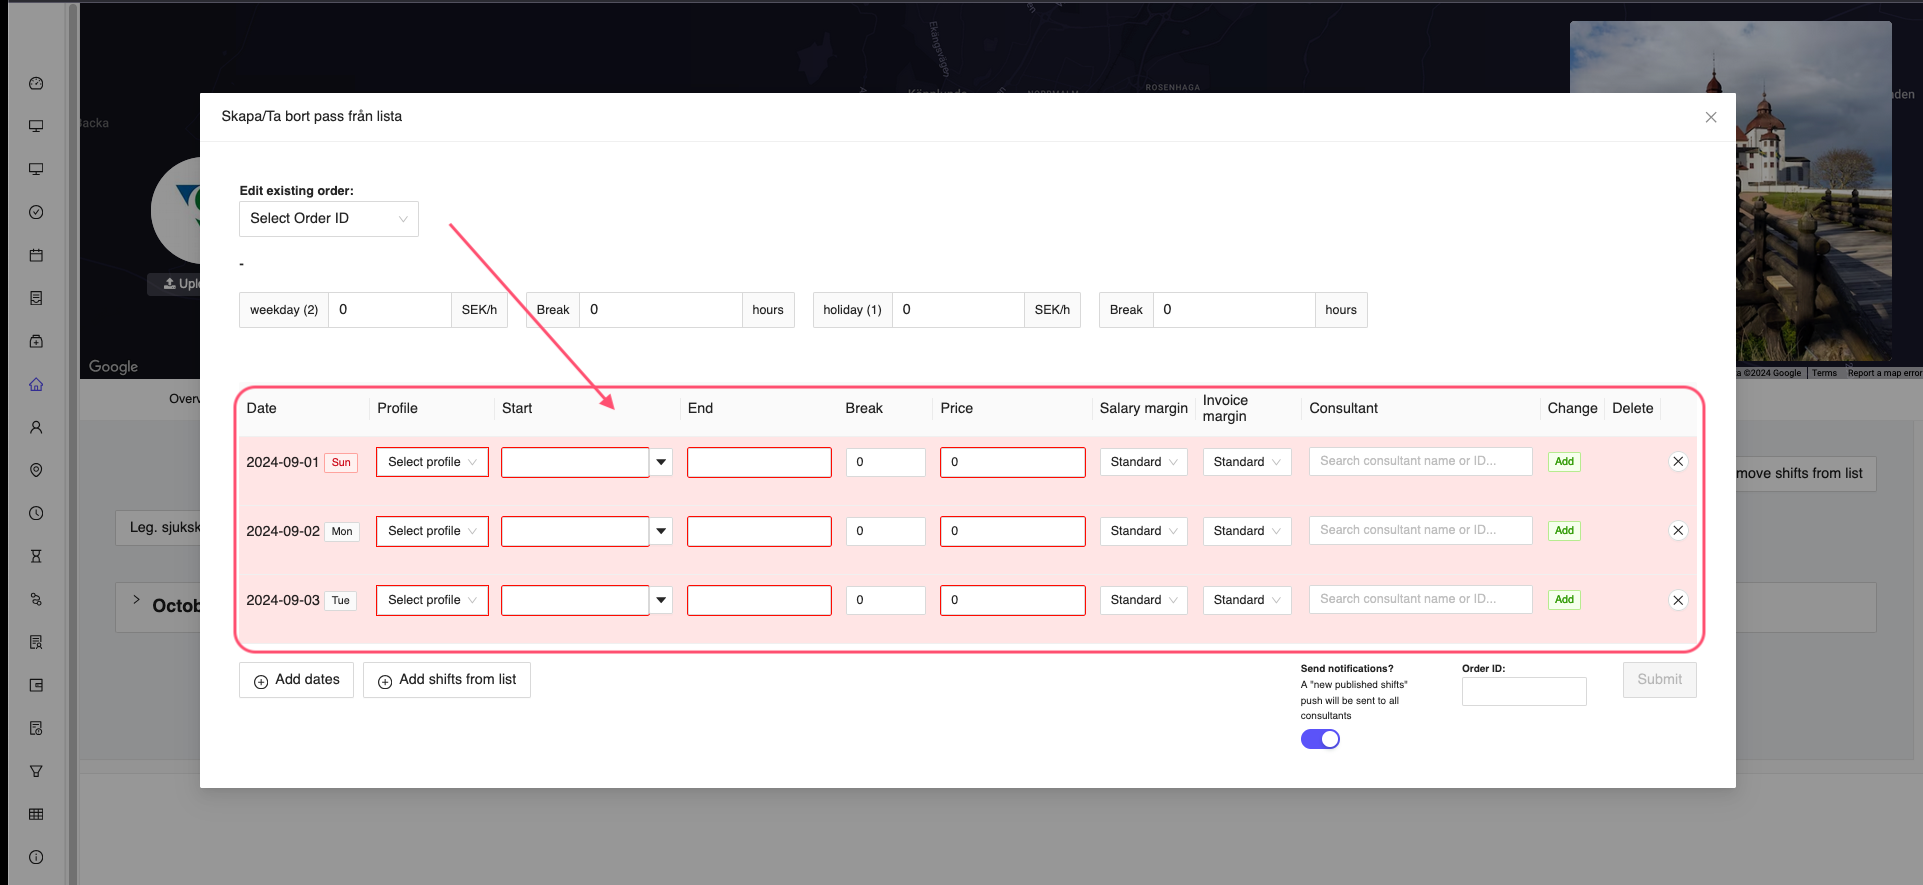
Figure 5: Show selected shift dates
A good feature that is available if you have selected multiple dates, is the Copy to all button at the bottom of each field. This will copy the value of the field to all the other shifts. This is useful when you want to copy the same value to all the shifts.

Figure 6: Copy details to all shifts
The selected dates shifts will be highlighted in red colour if you haven't filled everything in the shift details. Once you fill in all the details, the shifts will be having white colour.
Order ID - If you have a specific order id from the employer, you can also add that as well at the bottom of the window in the Order ID box. This will help in tracking the shifts based on the order id.
Send Notifications? - If you want to send notifications to the consultants for the shifts, you can enable the Send Notifications? button at the bottom of the window (this is enabled by default, so no need to do anything). This will send notifications to the consultants who are interested in the shifts. But if you don't want to send notifications, you can disable the button.
Once you are satisfied with the shifts, you can click on the Submit button at the bottom of the window to save the shifts and publish it. You will get a small window with the message Publish without order id?. You can either click Publish to publish the shifts without the order id or click Cancel to cancel the operation and add the order id.
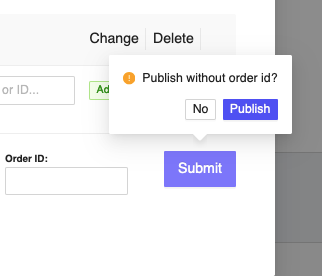
Figure 7: Publish ads
Shift details
In the employer shifts tab, you will be able to view the shifts created by the admin user or the employer (using their employer applications) as shown in the Figure 8 below.
You have the ability to see past shifts, upcoming shifts, and the shifts that are currently in progress. To do this, you can click on the month for which you want to know the shift details. And the shifts details will be expanded to show the details.
You can also view the details of the shifts, such as:
- Week number - The week number of the shift that has been created
- Date - The date of the shift
- Duration - Shift timing including total duration
- Break - Break time during the shift, if any
- Price - The price of the shift in total SEK
- Compenstation - The compensation for the shift, which shows the total salary paid to the consultant, pension, and other benefits
- Application - The applications received for that particular shift from the consultants
- Bookings - The bookings made for that particular shift by a consultant. This can be changed by the admin user or the employer as required.
- Shift ID - The unique identifier for the shift in the system. This can be used to identify the shift quickly by the support team (development team).
If the shift has been booked, the colour of that shift will be Green. If the shift has not been booked, then the colour will be Black.
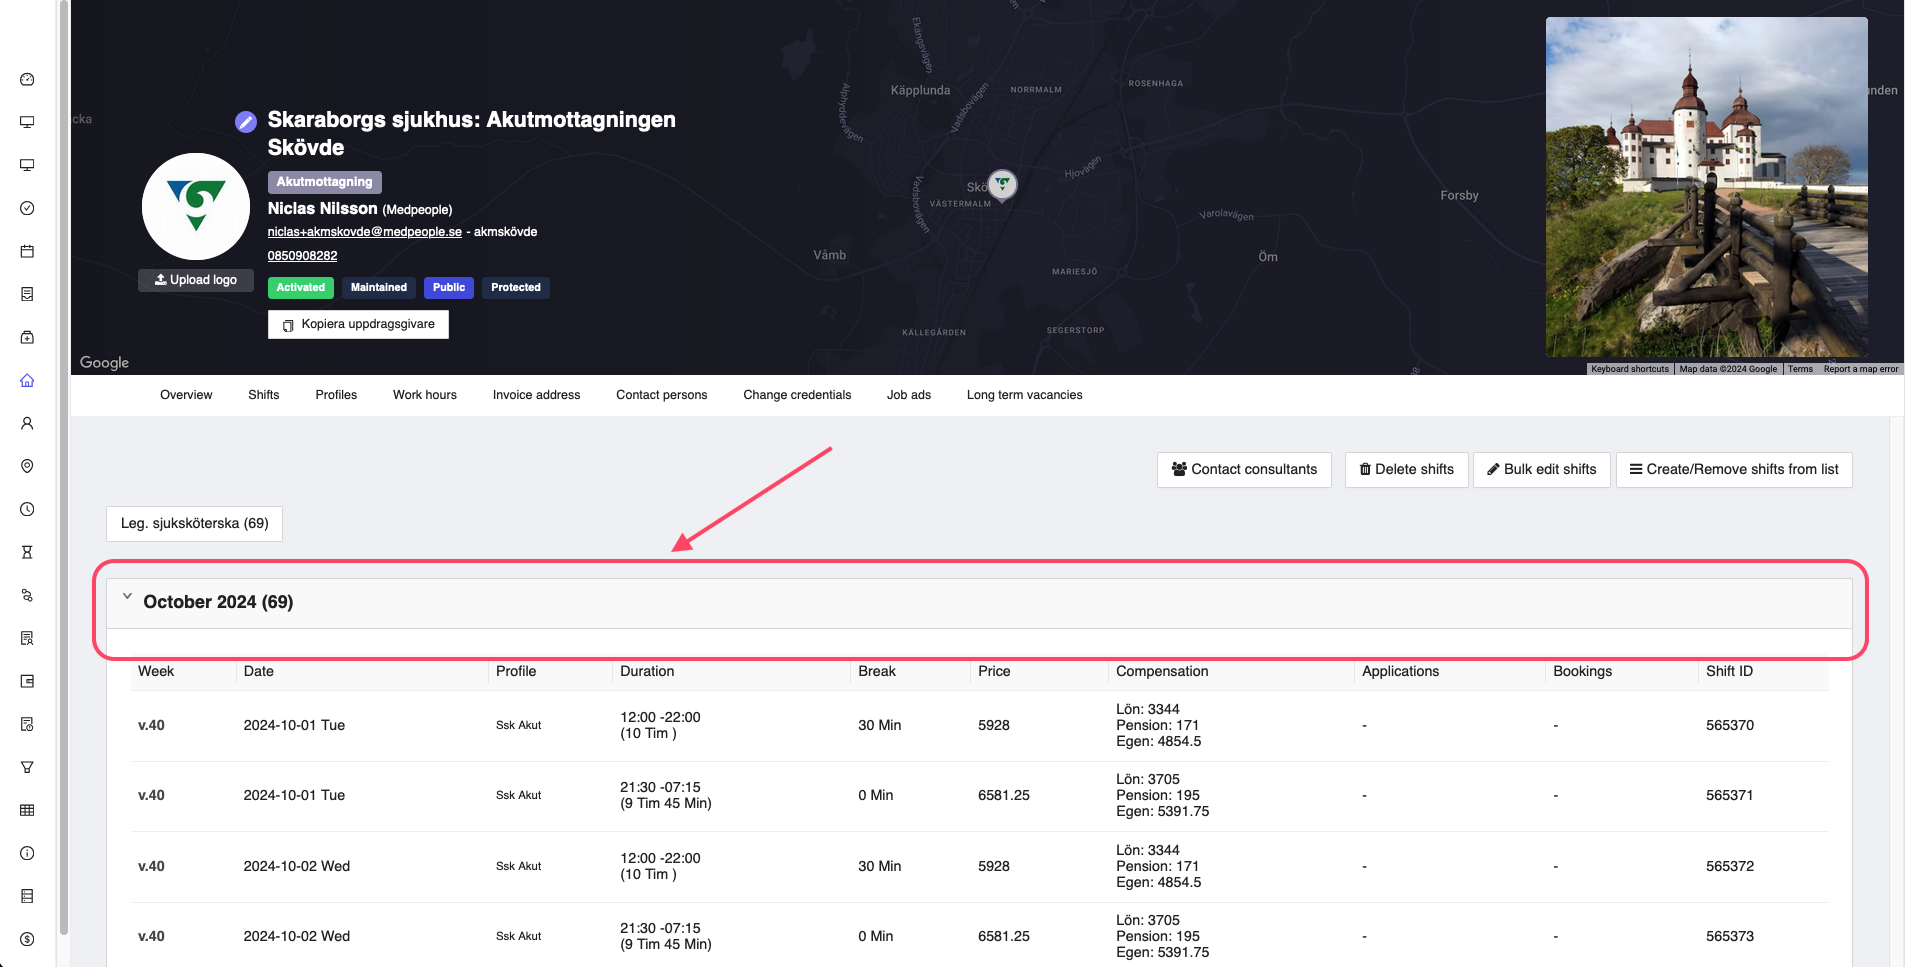
Figure 8: Employer view shifts list
You can view the shift details by clicking on the shift. This will expand the shift details on the right side of the application to show the details of the shift. You can view the details of the shift, such as the shift ID, the date of the shift, the duration of the shift, the break time, the price of the shift, the compensation, the applications received for the shift, the bookings made for the shift, etc.
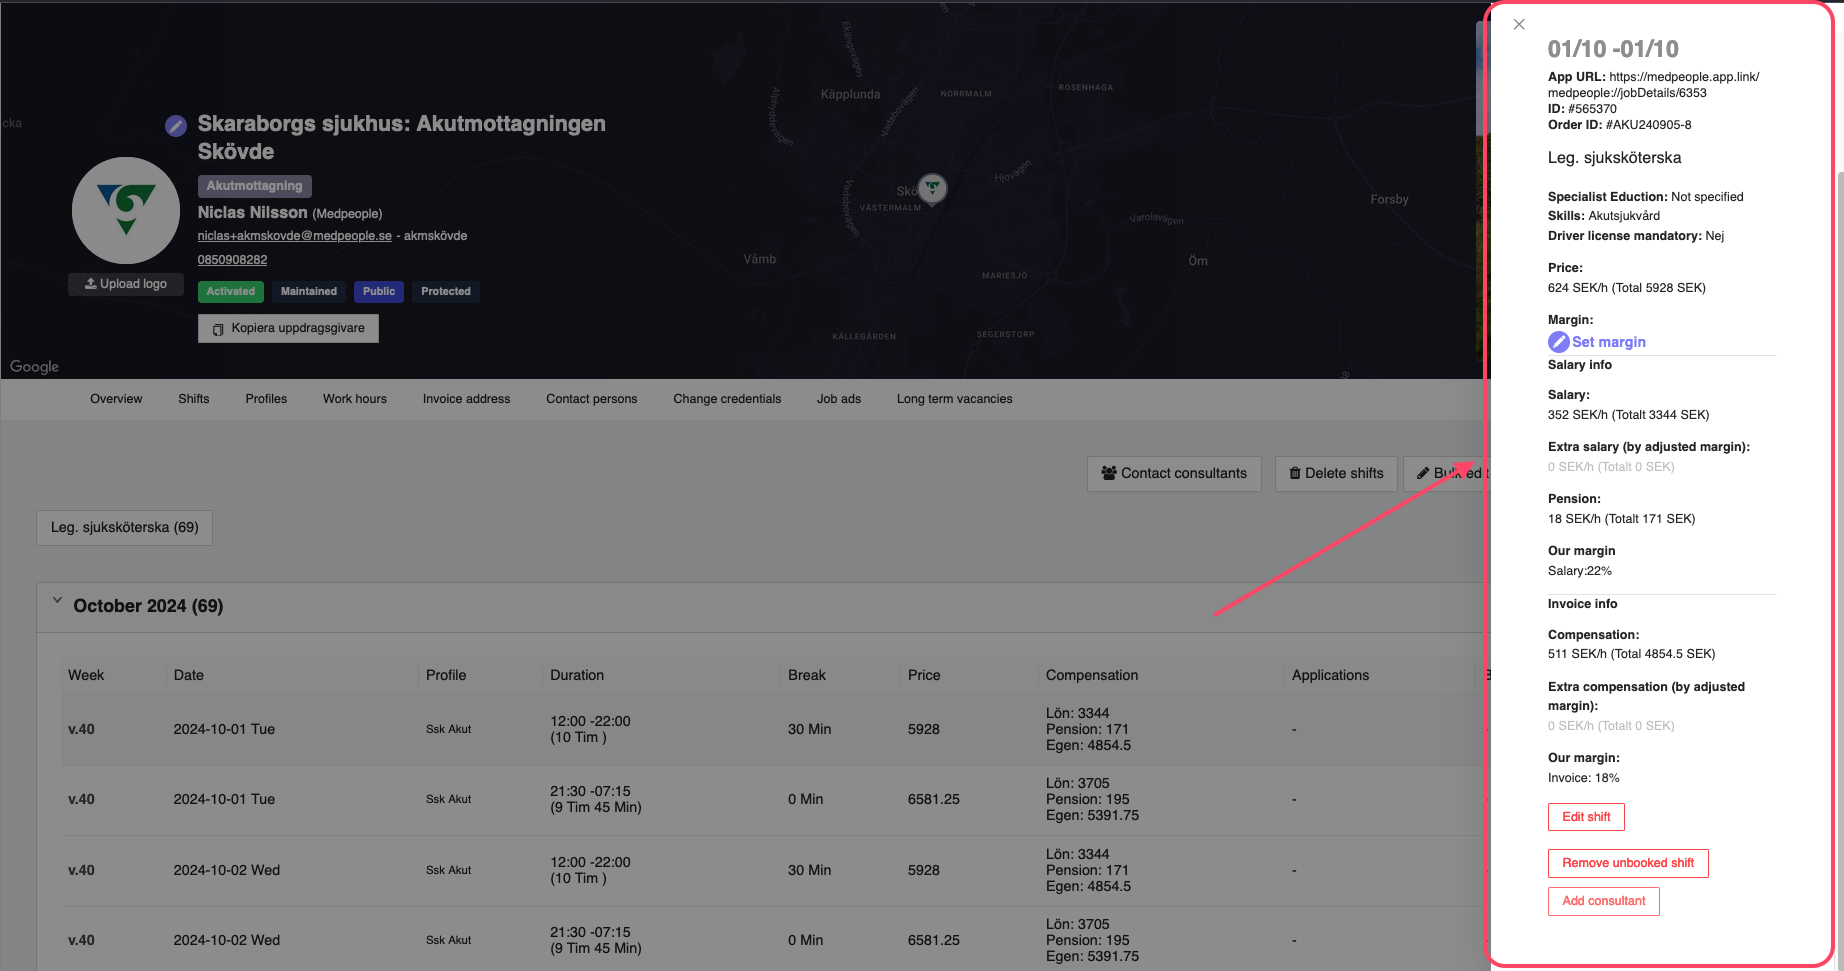
Figure 9: View employer shift details
Shift deep link (App URL)
Shift deep linking is a feature which allows the employer to share the specific shift with a consultant. This url when opened by the consultant will directly take them to the shift details page on their mobile application. This is useful when the employer wants to share the shift details with the consultant directly over email, intercom, or any other communication channel.
You can get the deep link from the App URL field in the shift details page. You can copy the link and share it with the consultant.
Figure 10: Shift deep link
Add consultant to the shift
To add a consultant to the shift, you can click on the Add consultant button at the bottom of the shift details. This will open a window where you can search for the consultant using the consultant name or the consultant ID.
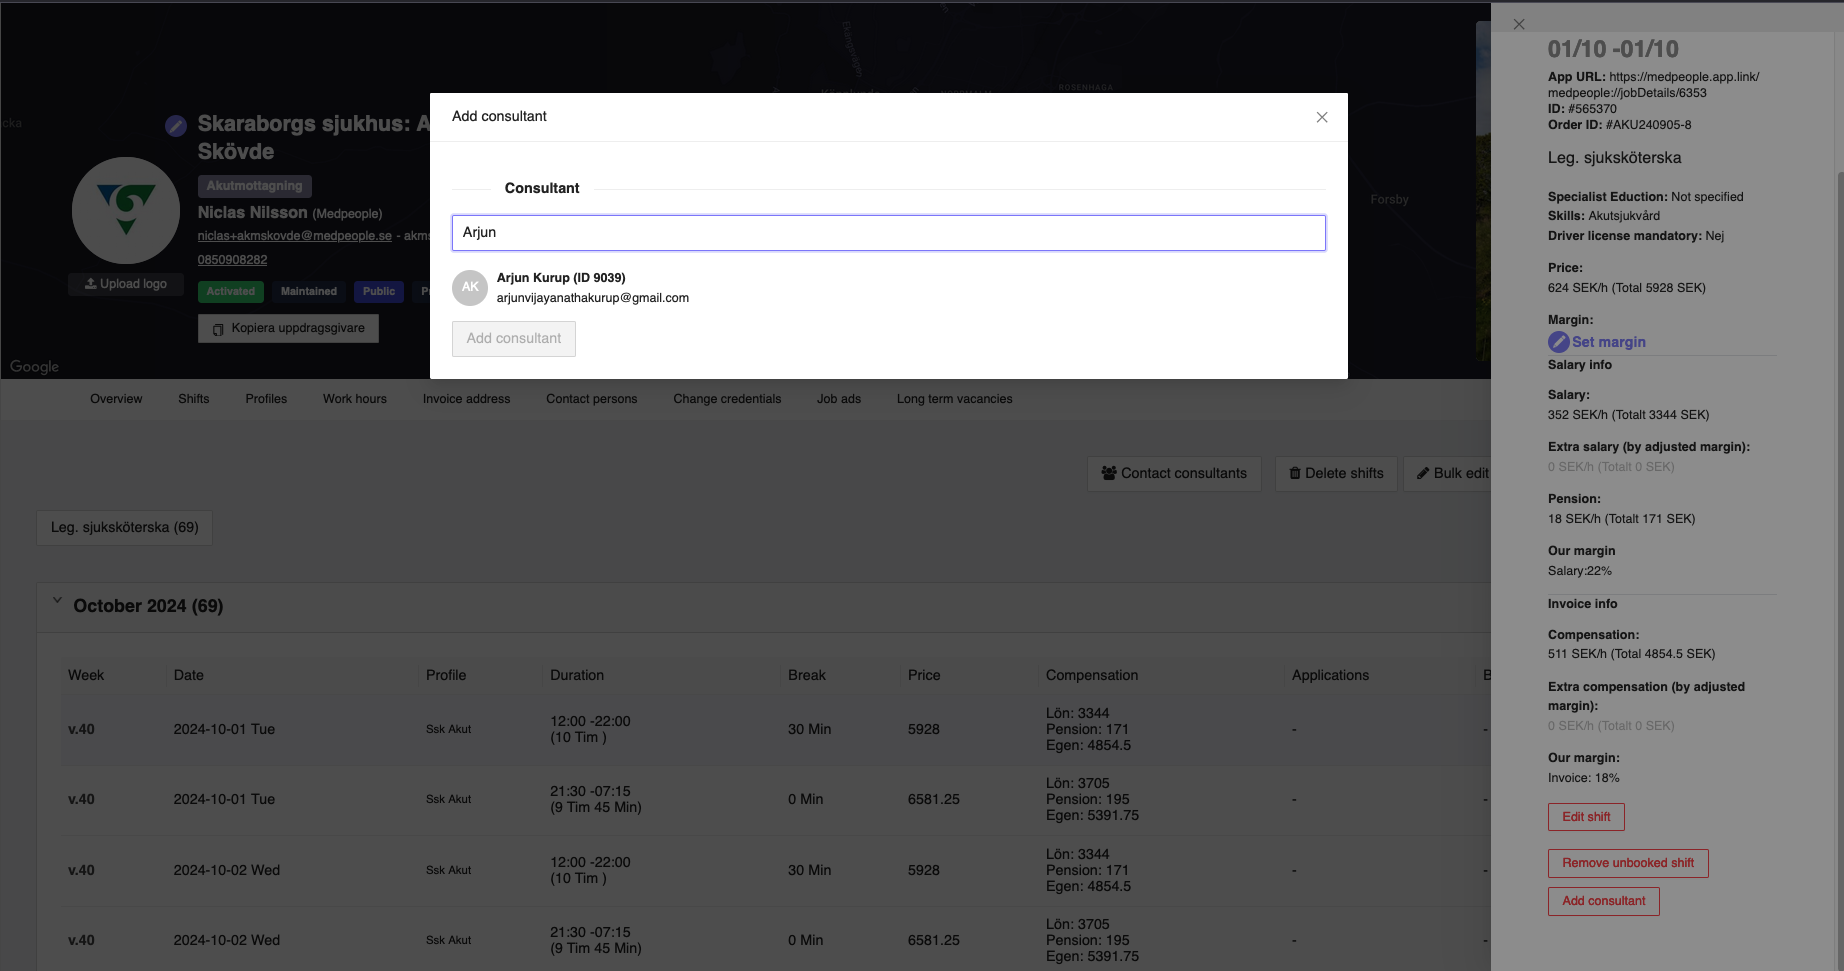
Figure 11: Search consultant
Once you find the consultant, you can click on the consultant name to add the consultant to the shift. Then you can click Add consultant button and this will automatically book the shift for the consultant. If you want to remove the selected consultant and add another consulant, you can click the X near the selected consultant on the right side. If you want to cancel the operation, you can click on the X button on the top right corner of the window.
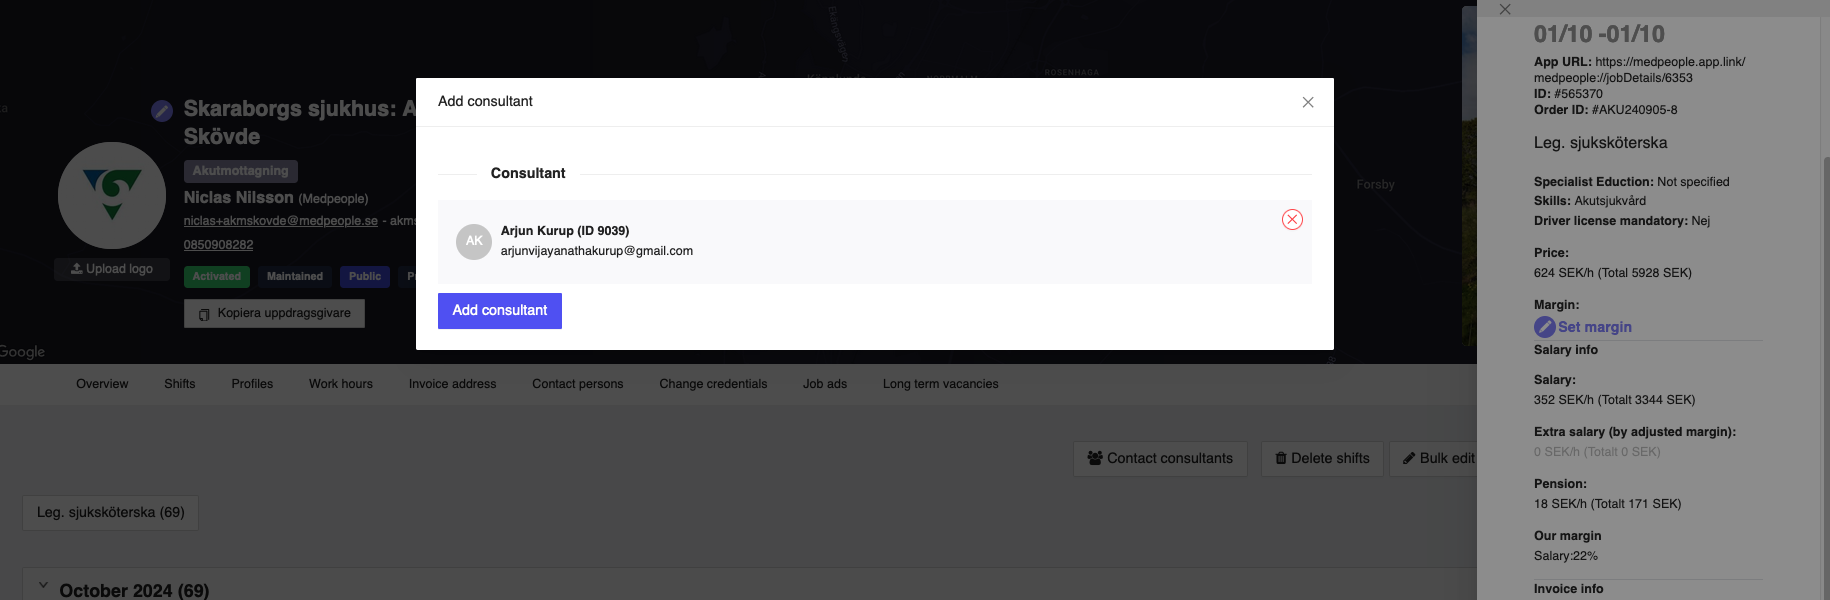
Figure 12: Add consultant to the shift
Once you select the consultant, the consultant will be shown in the shift's details section as shown in the Figure 4 above.
Edit shift
You can edit the shift details by clicking on the Edit button at the bottom of the shift details. This will open a window where you can edit the shift details, such as the shift date, profile, the shift duration, the break time, the price of the shift, etc. Once you make the changes, you can click on the OK button to save the changes. If you want to cancel the operation, you can click on the X button on the top right corner of the window or Cancel button at the bottom of the window.
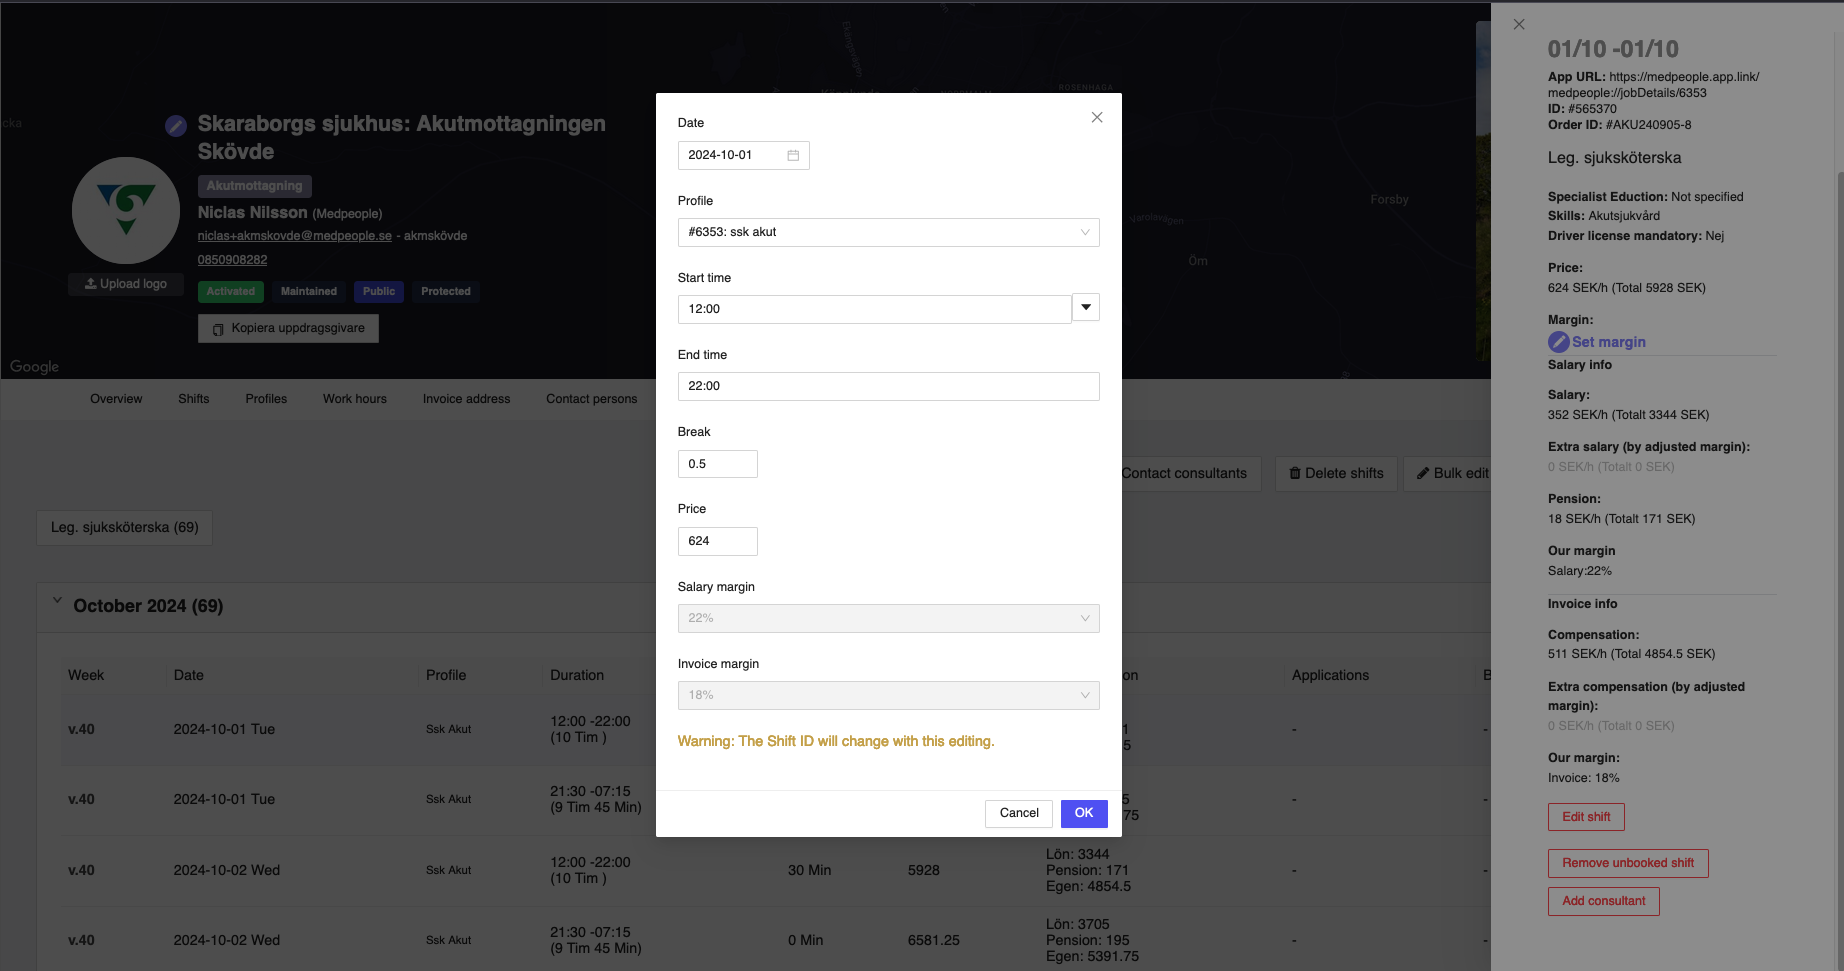
Figure 13: Edit a shift
Employed Consultants
If you are an existing employer and have employed consultants in the past, you will be able to see those employed consultants in the Employed Consultants section. However, if you are a new employer and have not employed any consultants, then this section will be empty, and you won't be able to see any employed consultants.
To see the employed consultants, you can click on the Employed Consultants tab to expand and show the list of the employed consultants.
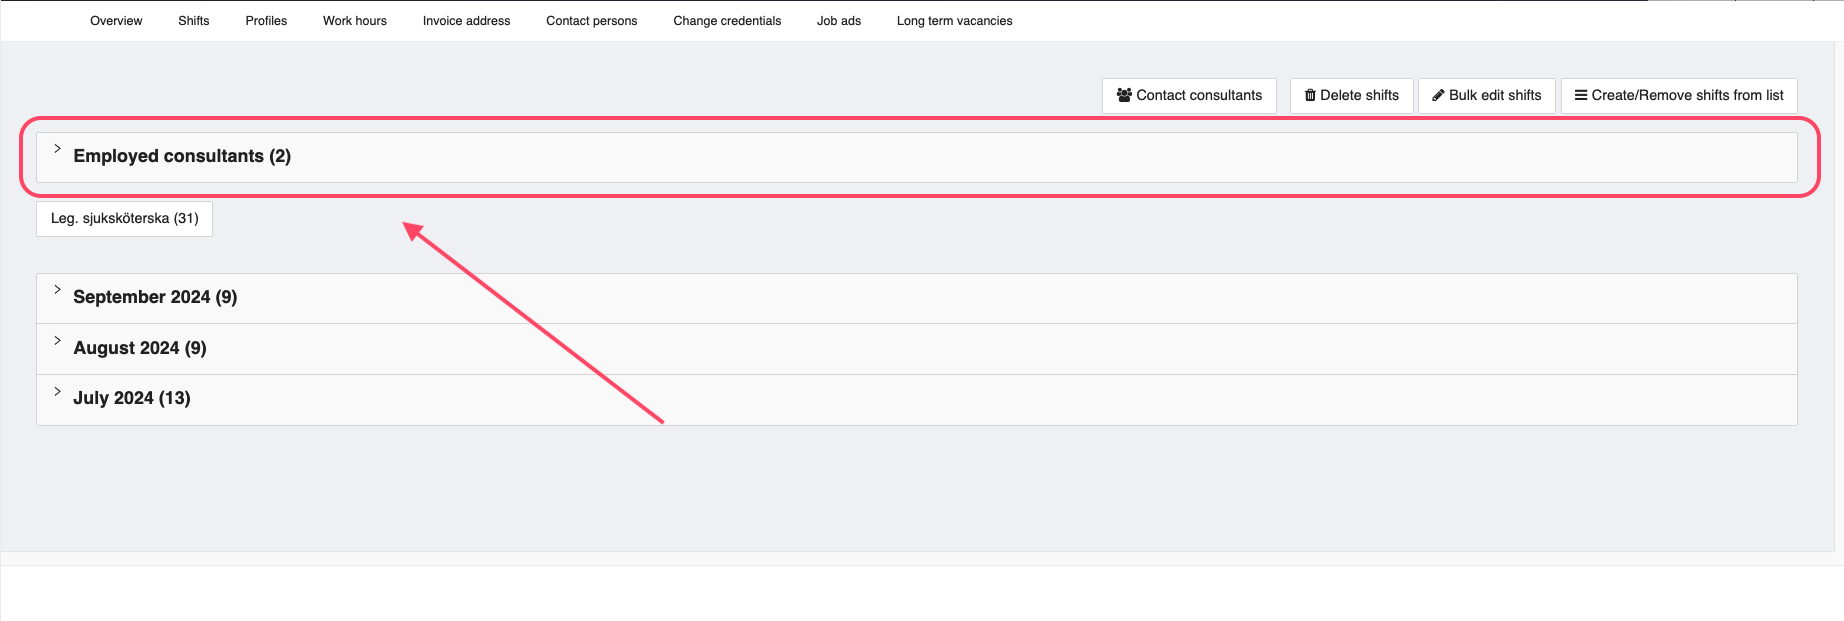
Figure 14: Employed Consultants tab
You can view the profile of the consultants by clicking on the consultant name. This will redirect you to the consultant details page where you can view the consultant details.
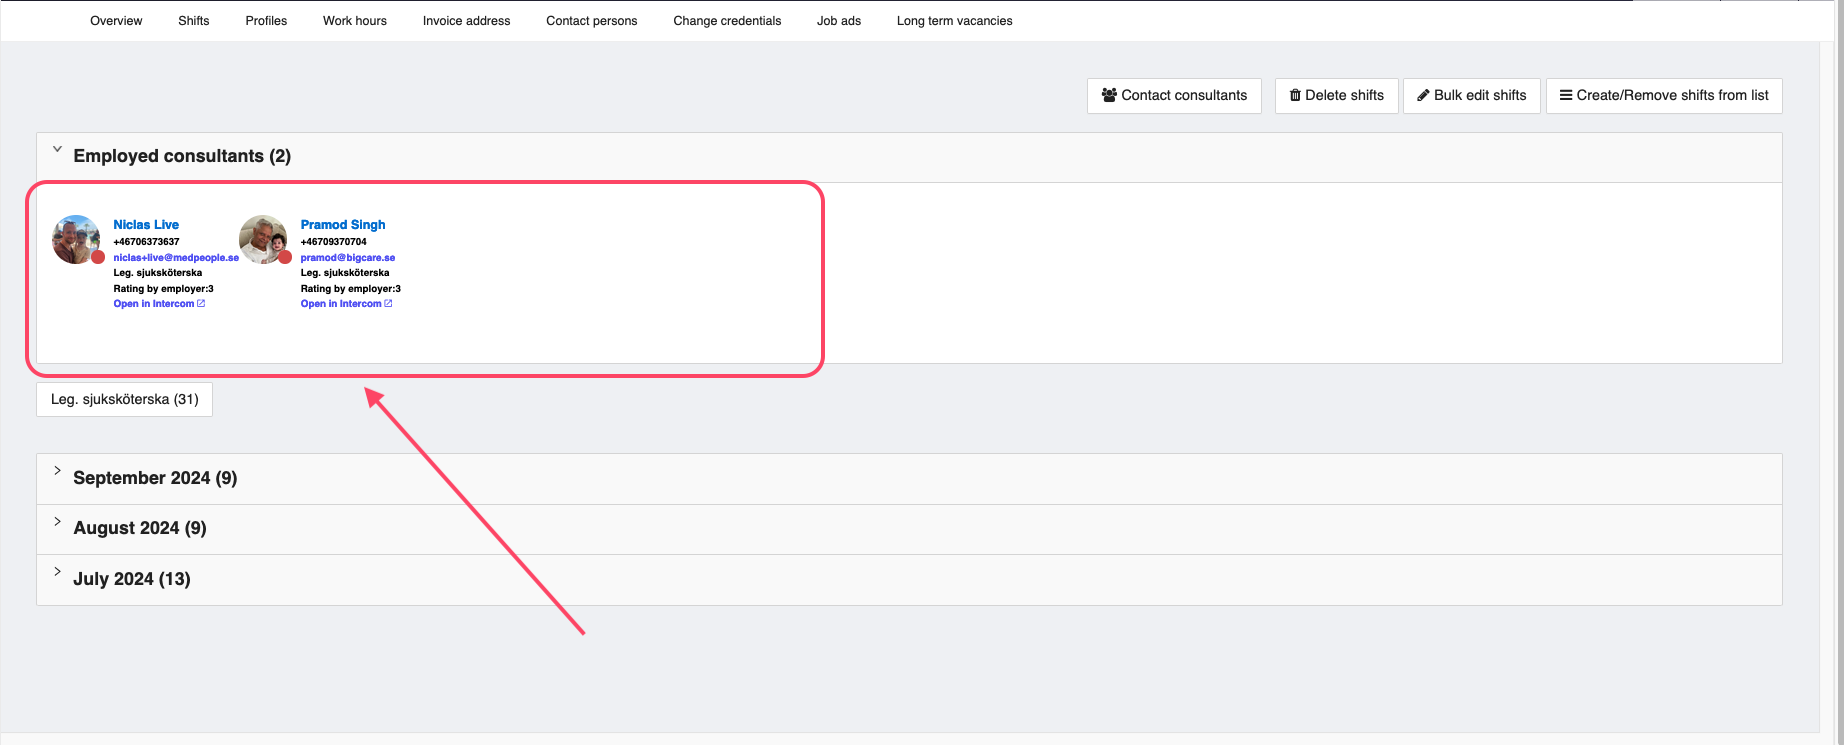
Figure 15: Employed Consultants list
Shift filter
You can filter the shifts based on the type of shift, the employer has created. These filters are available on the top left corner of the shifts tab. You can see an example of the filter in the Figure 10 below. If there are more job types, then you will be able to see multiple filters. And you can select the required filter to view the shifts based on the filter.
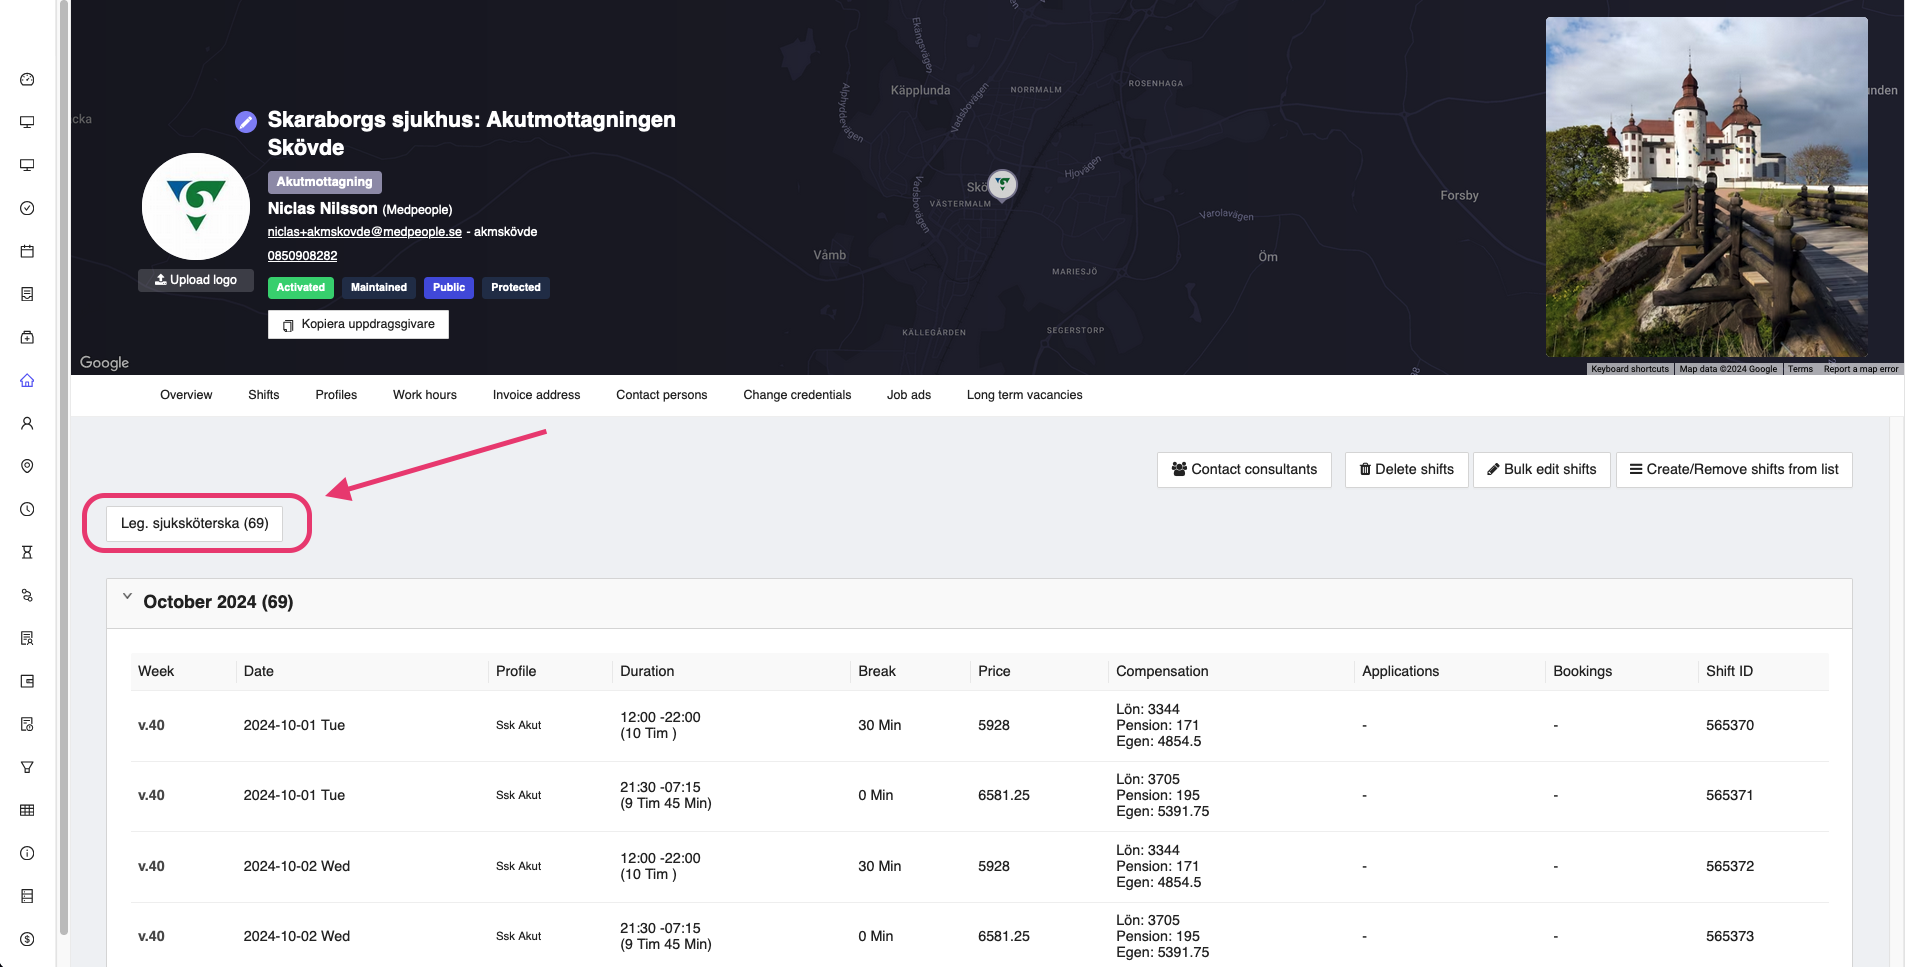
Figure 16: Employer shifts filter
Contact consultant
If you want to contact consultants for the shifts, you can do so by clicking on the Contact consultants button at the bottom right corner just like the one shown in the Figure 11 below.
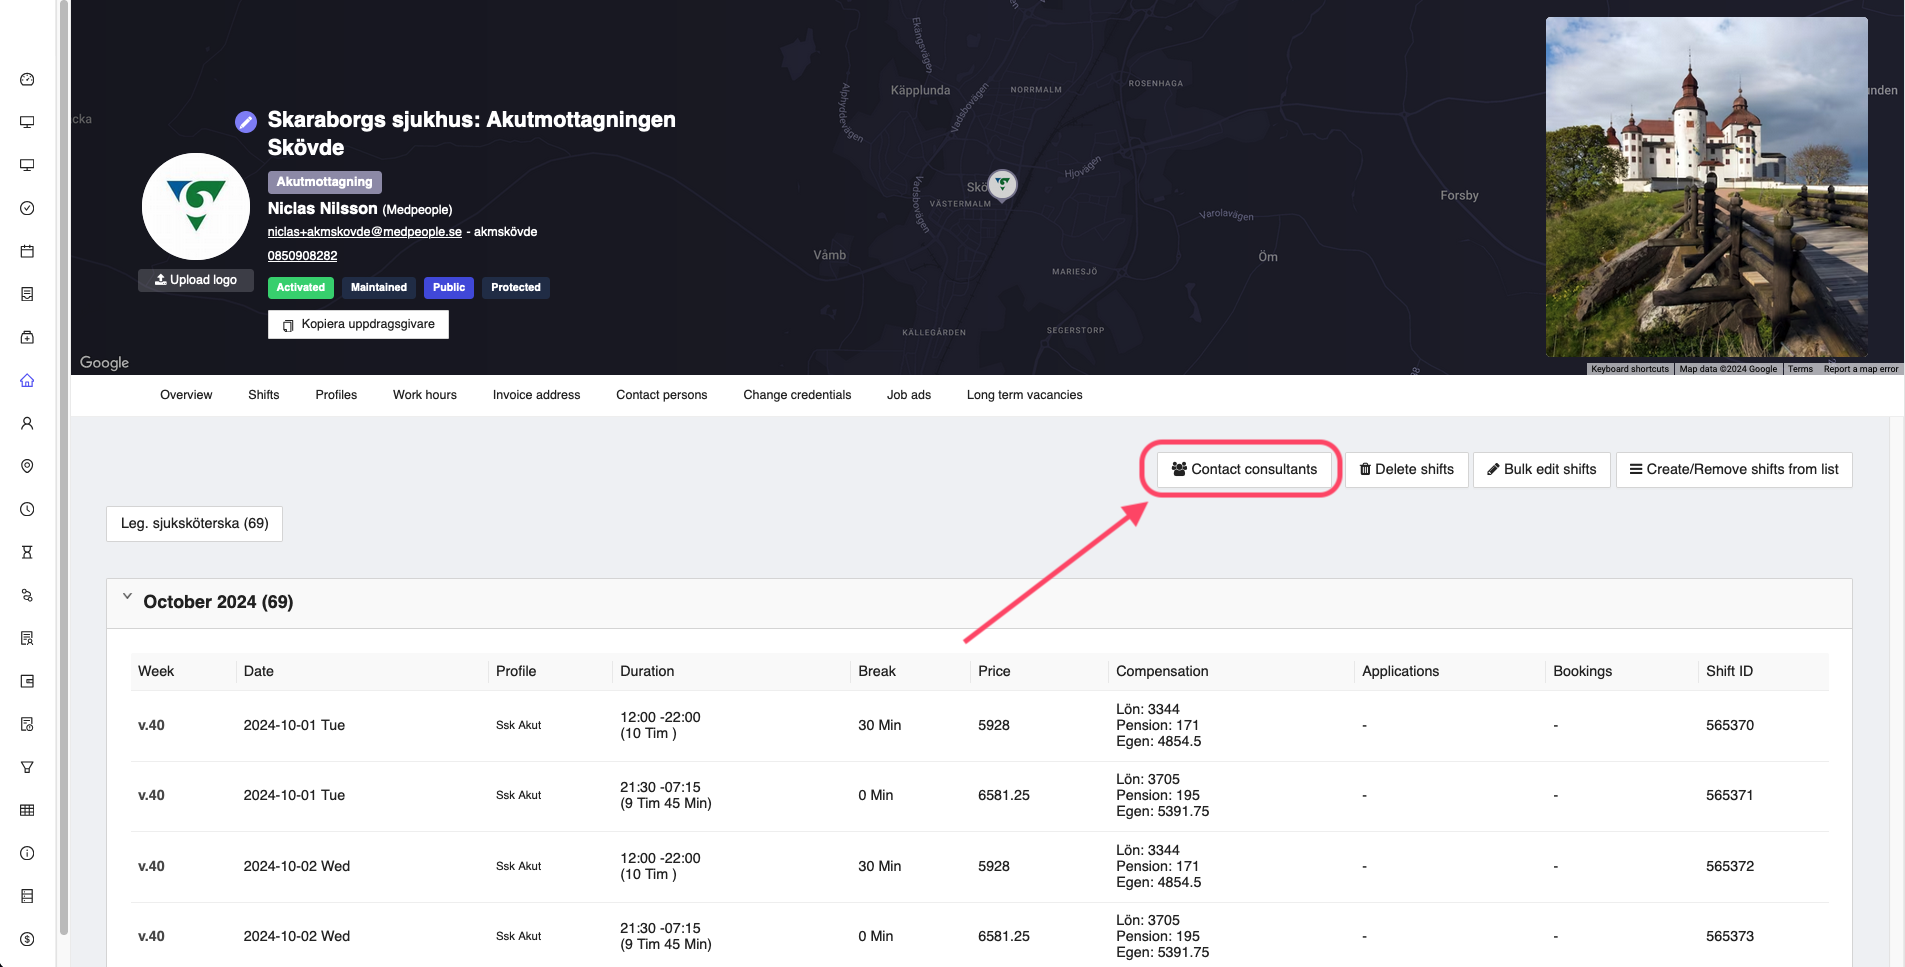
Figure 17: Contact consultant
This will open a window where you are provided with three options to contact the consultants:
- Regular - this button will open all the regular consultants who were active in the past
- Employed - this button will open a window with all the past employed consultants
- Close Consultants - this will open a window with all the consultants who are close to the employer's location. This is useful when the employer wants to contact the consultants who are close to the employer's location.
In the windows, you can select the consultants that are interesting and click Set tag on consultants in intercom at the bottom after adding a tag so that you will be able to initiate further direct communication through intercom.
You can choose the consulant based on rating, distance, skill set, etc.

Figure 18: Contact employed consultant window
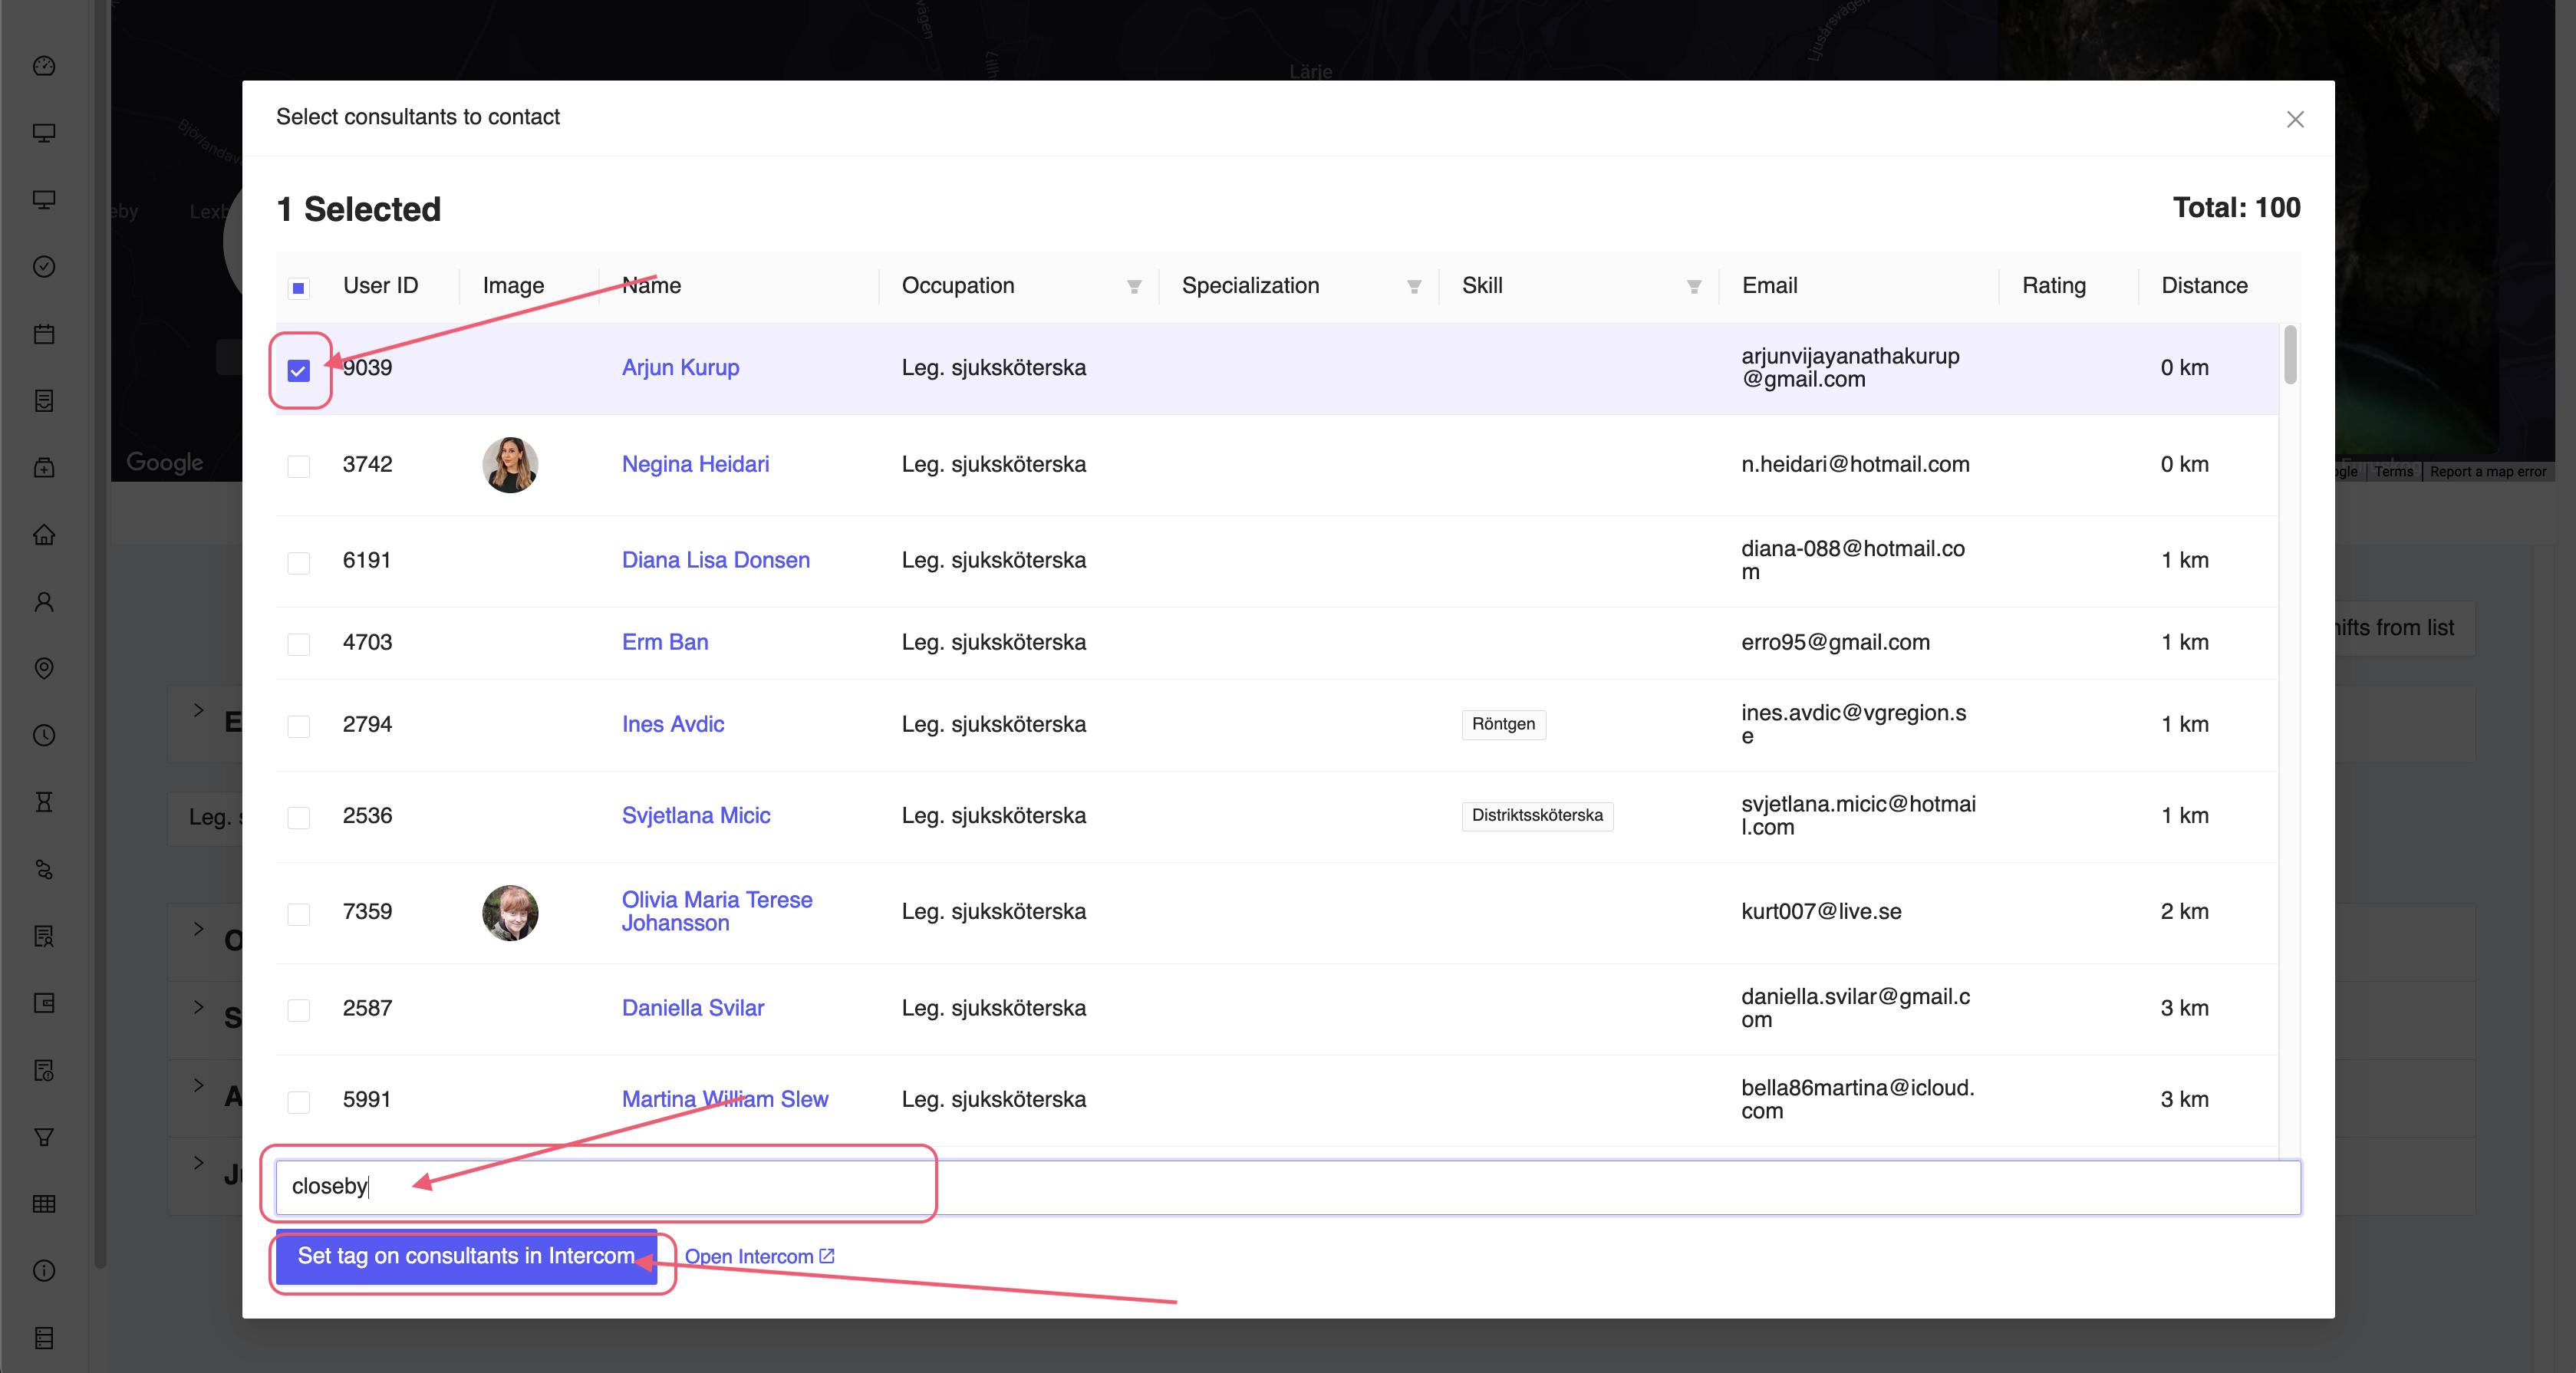
Figure 19: Contact close consultant window
Bulk edit shifts
You have the ability to edit a single shift or bulk edit a set of shift using the bulk edit feature. To bulk edit the shifts, you can click on the Bulk edit shifts button on the top right corner of the shifts tab.
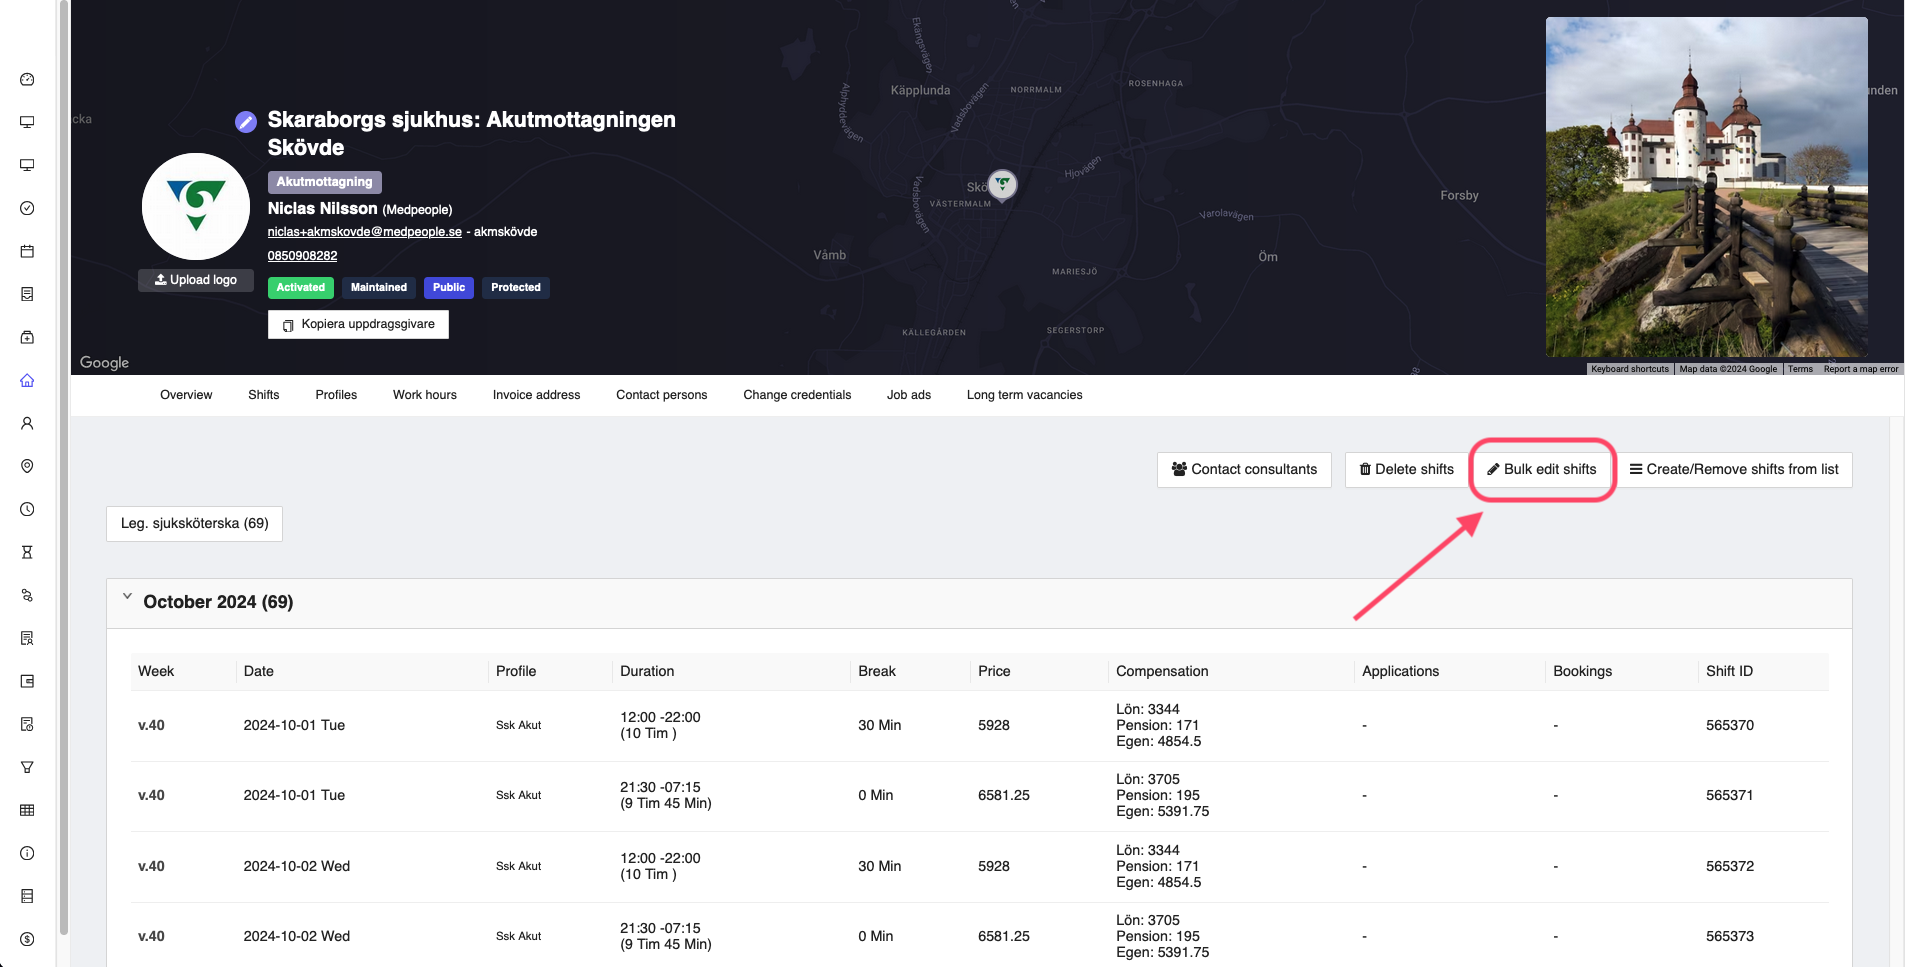
Figure 20: Bulk edit shifts
This will open a window where you can select the shifts that you want to edit.
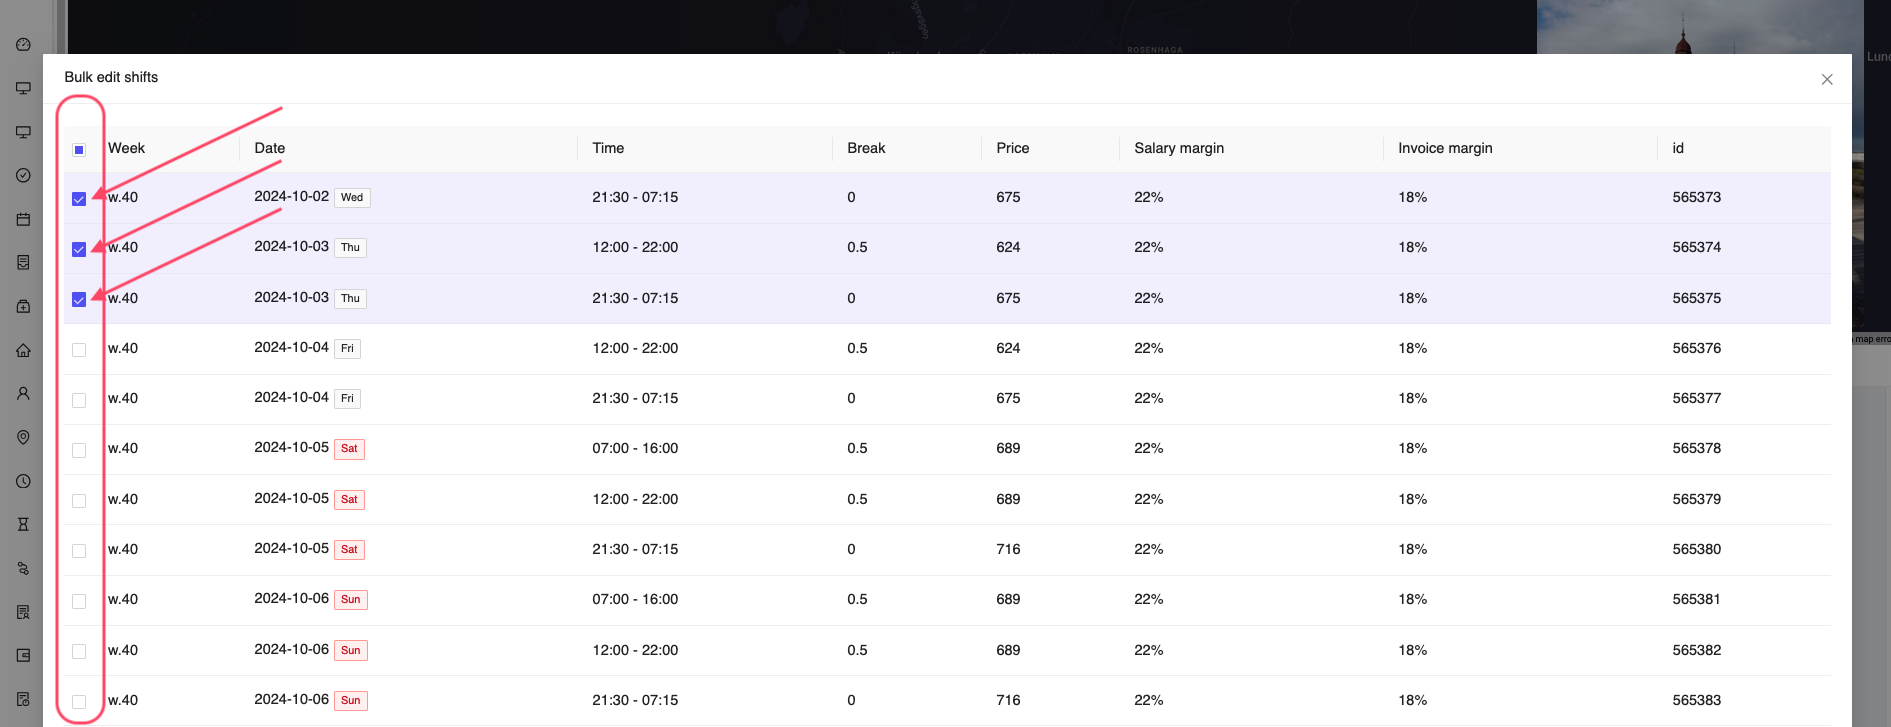
Figure 21: Select shifts for bulk edit
Once you select the shifts, at the bottom of the window, you have the ability to change the price of the selected shift/shifts, modify the margin of the shift/shifts and modify the invoice margin of the shift/shifts.
Once you are satisfied with the changes, you can select the Update all selected button at the bottom of the window to update the selected shifts.
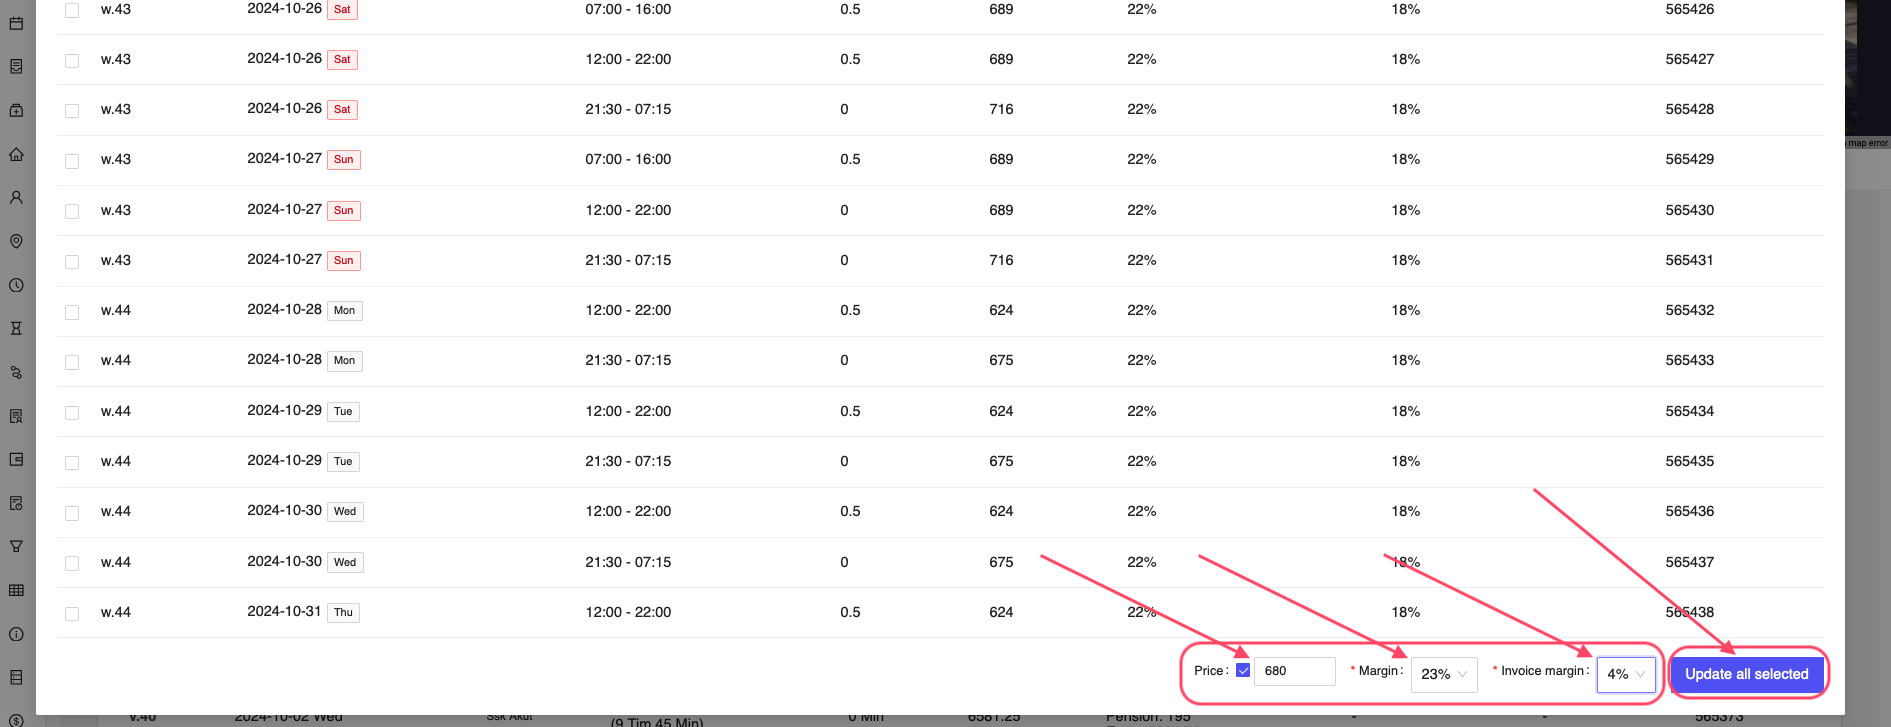
Figure 22: Save bulk edited shifts
If the update was successful, you will receive another window with the message The shifts have been updated. You can click on the Close button to close the window.
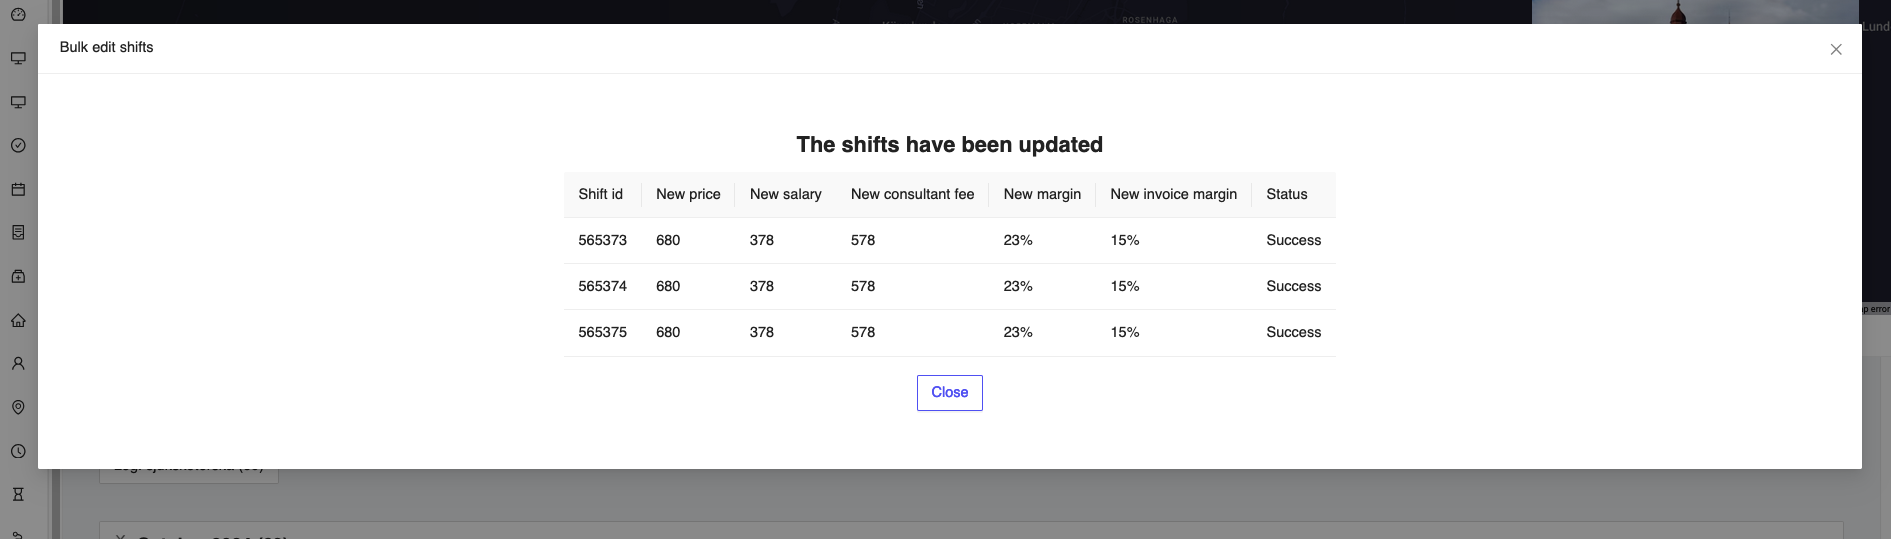
Figure 23: Bulk edit shifts confirmation
Delete shifts
For deleting the shifts that the employer has created or the admin has created, you can click on the Delete shifts button on the top right corner of the shifts tab.
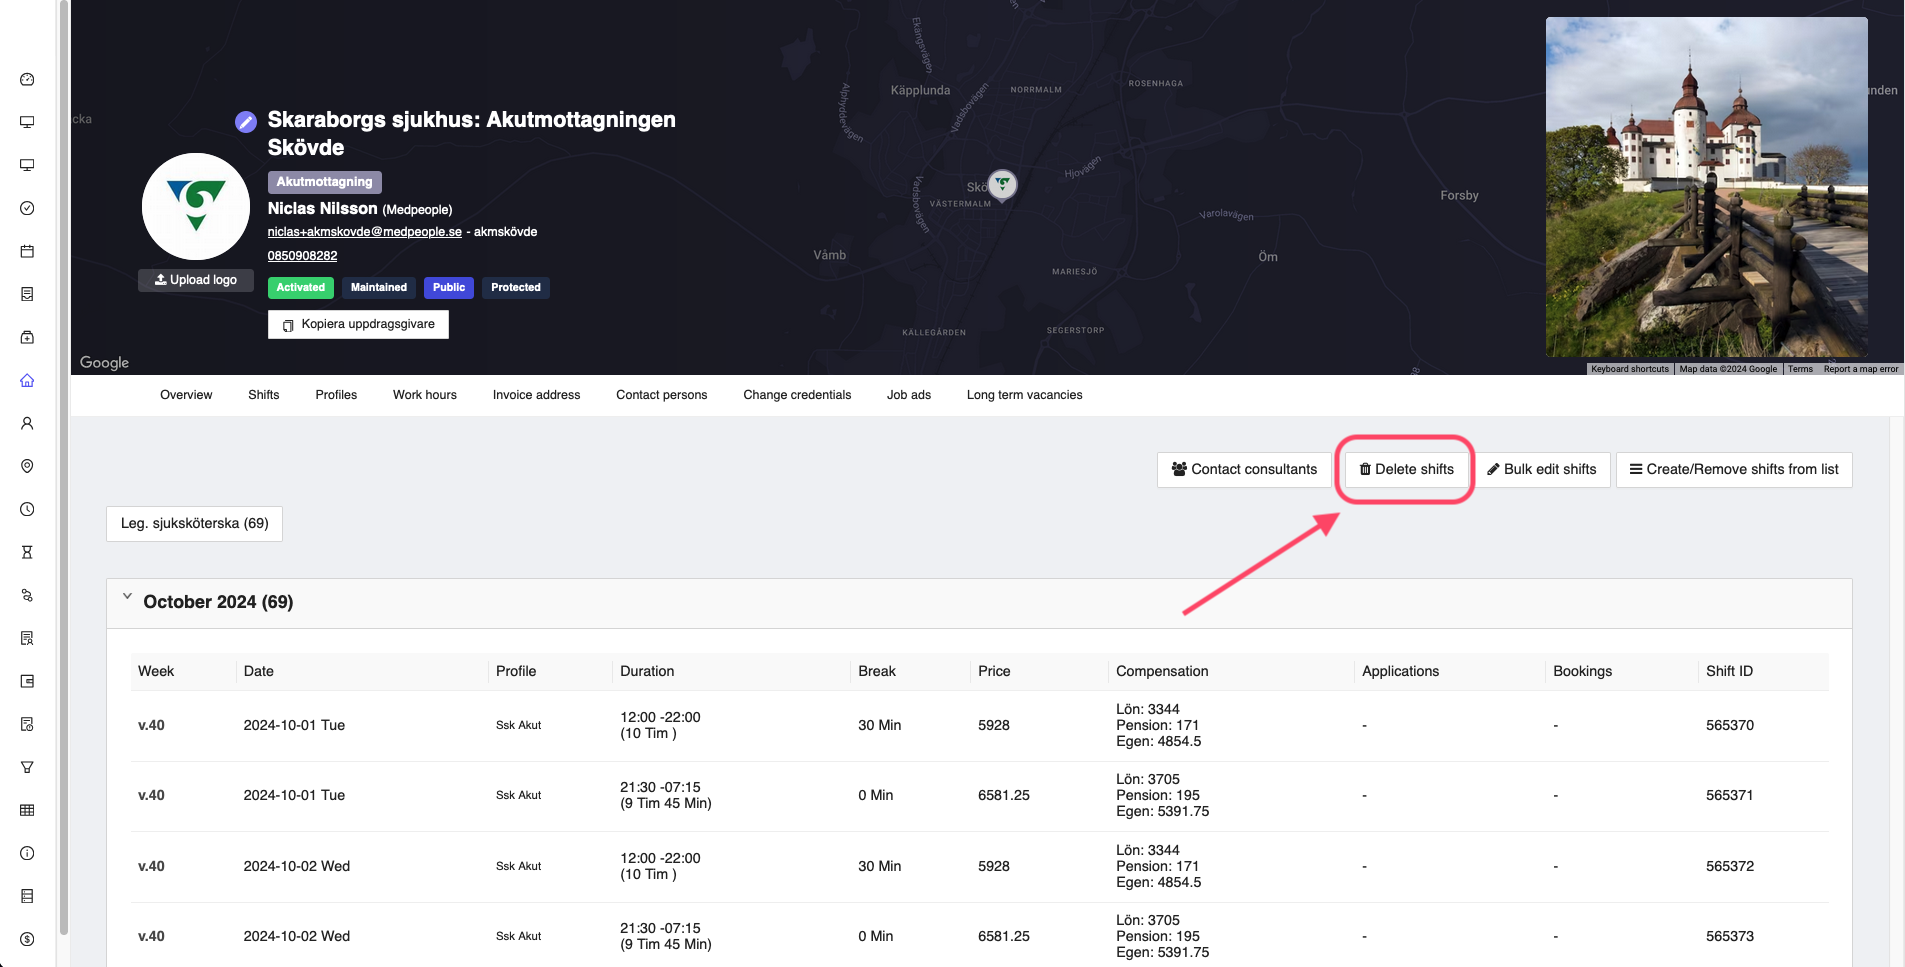
Figure 24: Delete shifts
This will open a window where you can select the shifts that you want to delete.
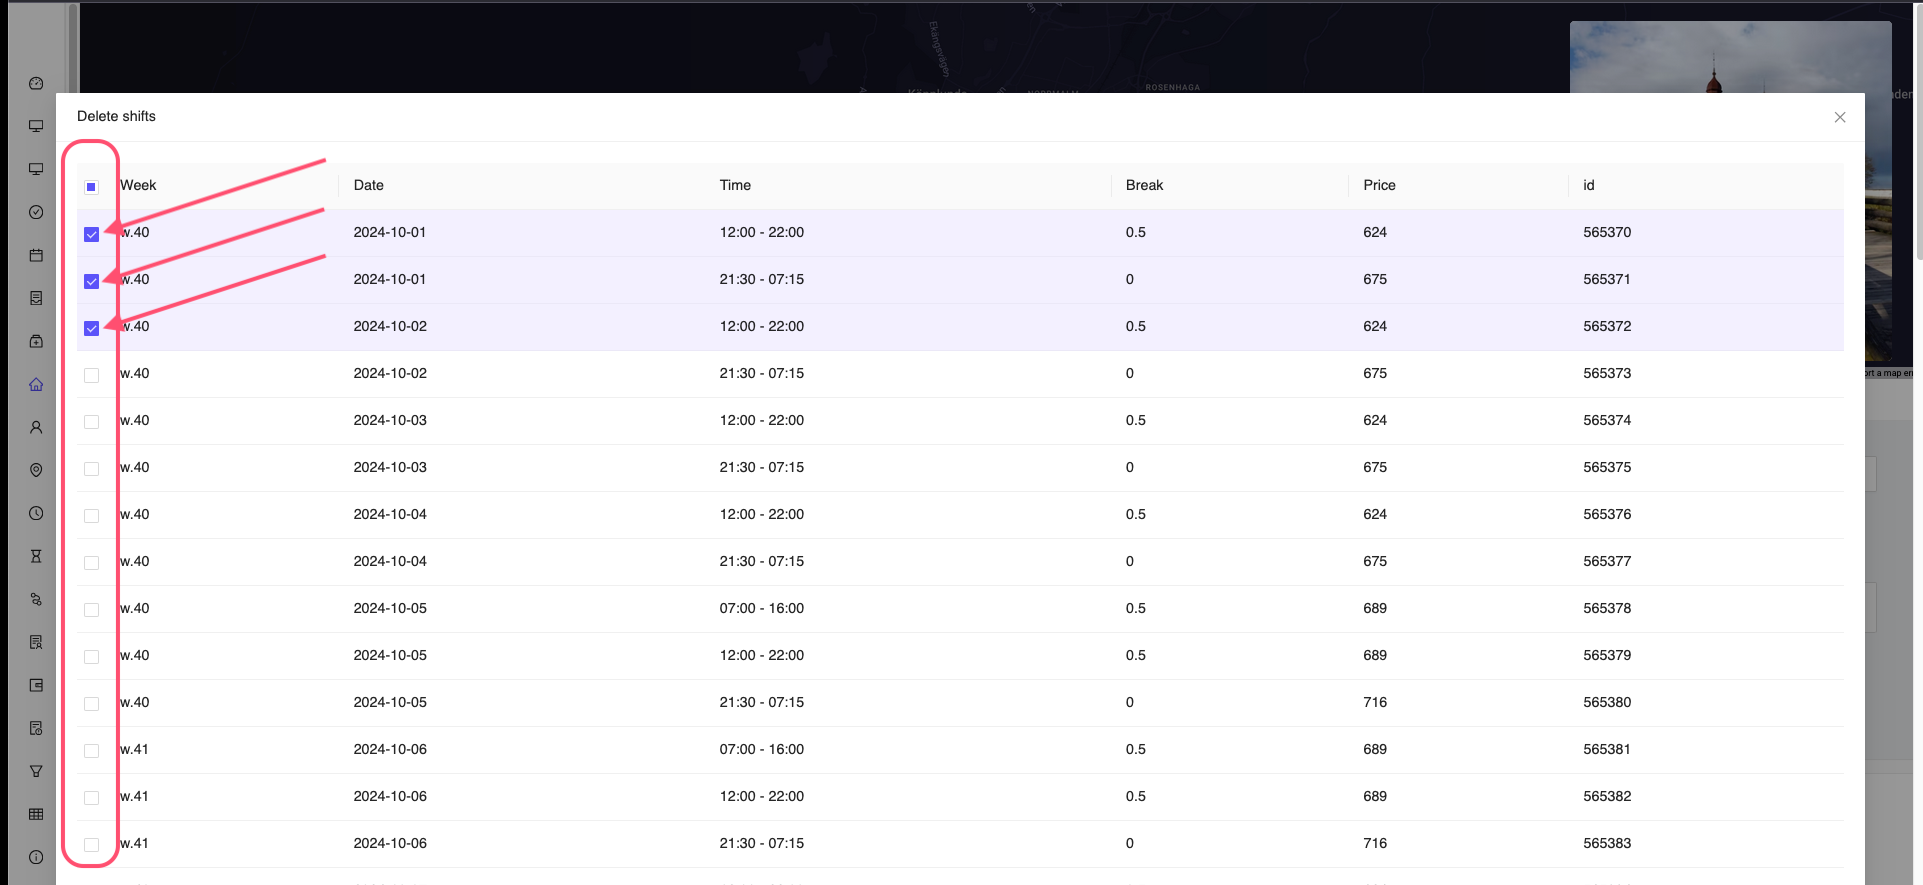
Figure 25: Select shifts for deleting
Once you select the shifts, you can click on the Delete button at the bottom of the window to delete the selected shifts.
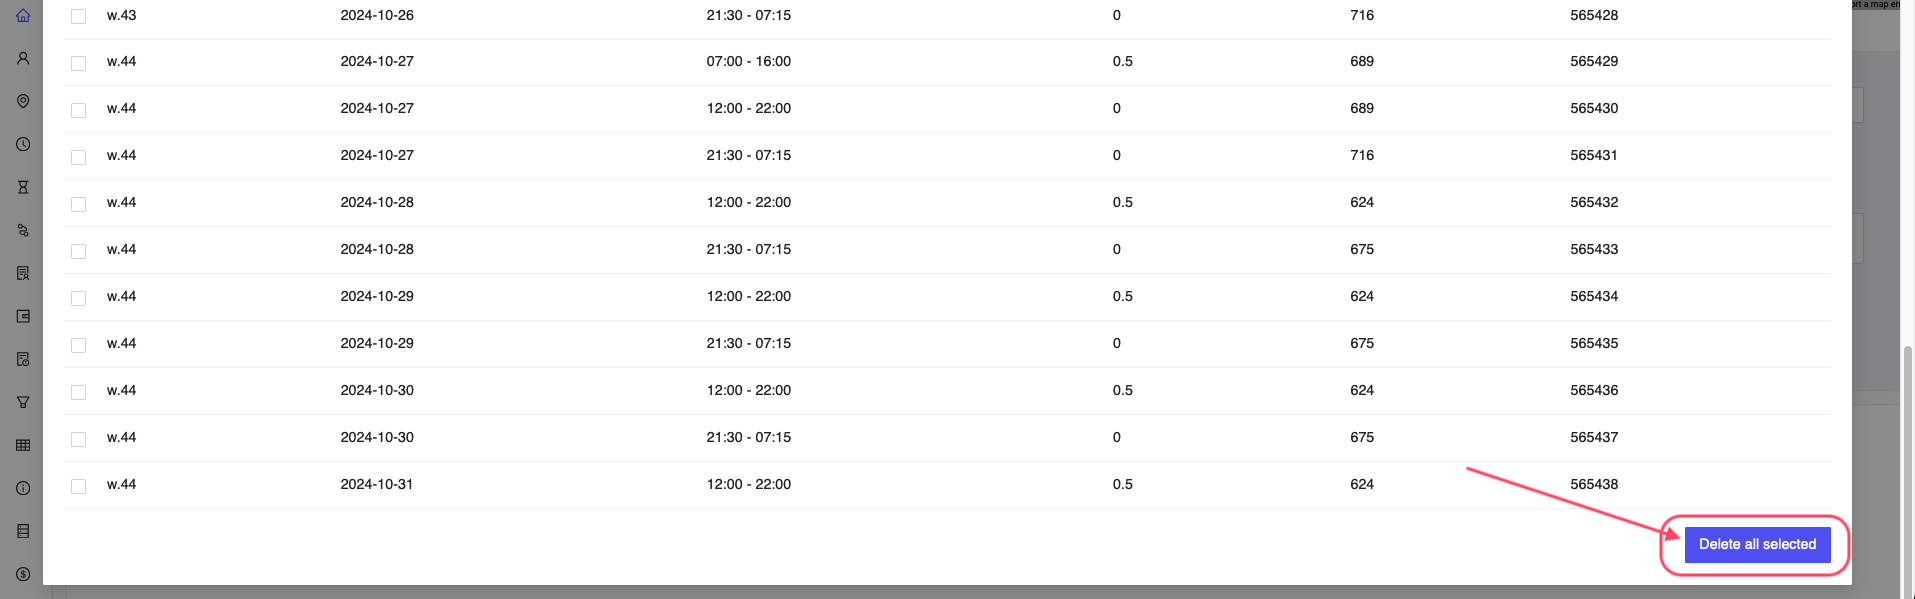
Figure 26: Delete selected shifts
If the deletion was successful, you will receive another window with the message The shifts have been deleted. You can click on the Close button to close the window.

Figure 27: Shifts deleted confirmation
If you have booked a consultant for a shift and you are trying to delete the shift,then you will receive a warning message that the shift cannot be deleted as the shift has been booked by a consultant. You will have to remove the consultant from the shift before you can delete the shift or provide a reason for the deletion.