Employers
The Employers page is used for managing the employers of the Medpeople project. The page contains a list of all the employers registered in the system. Admin users can:
- View the list of employers
- Edit employer details
- Disable/Ban/Remove employers from the system
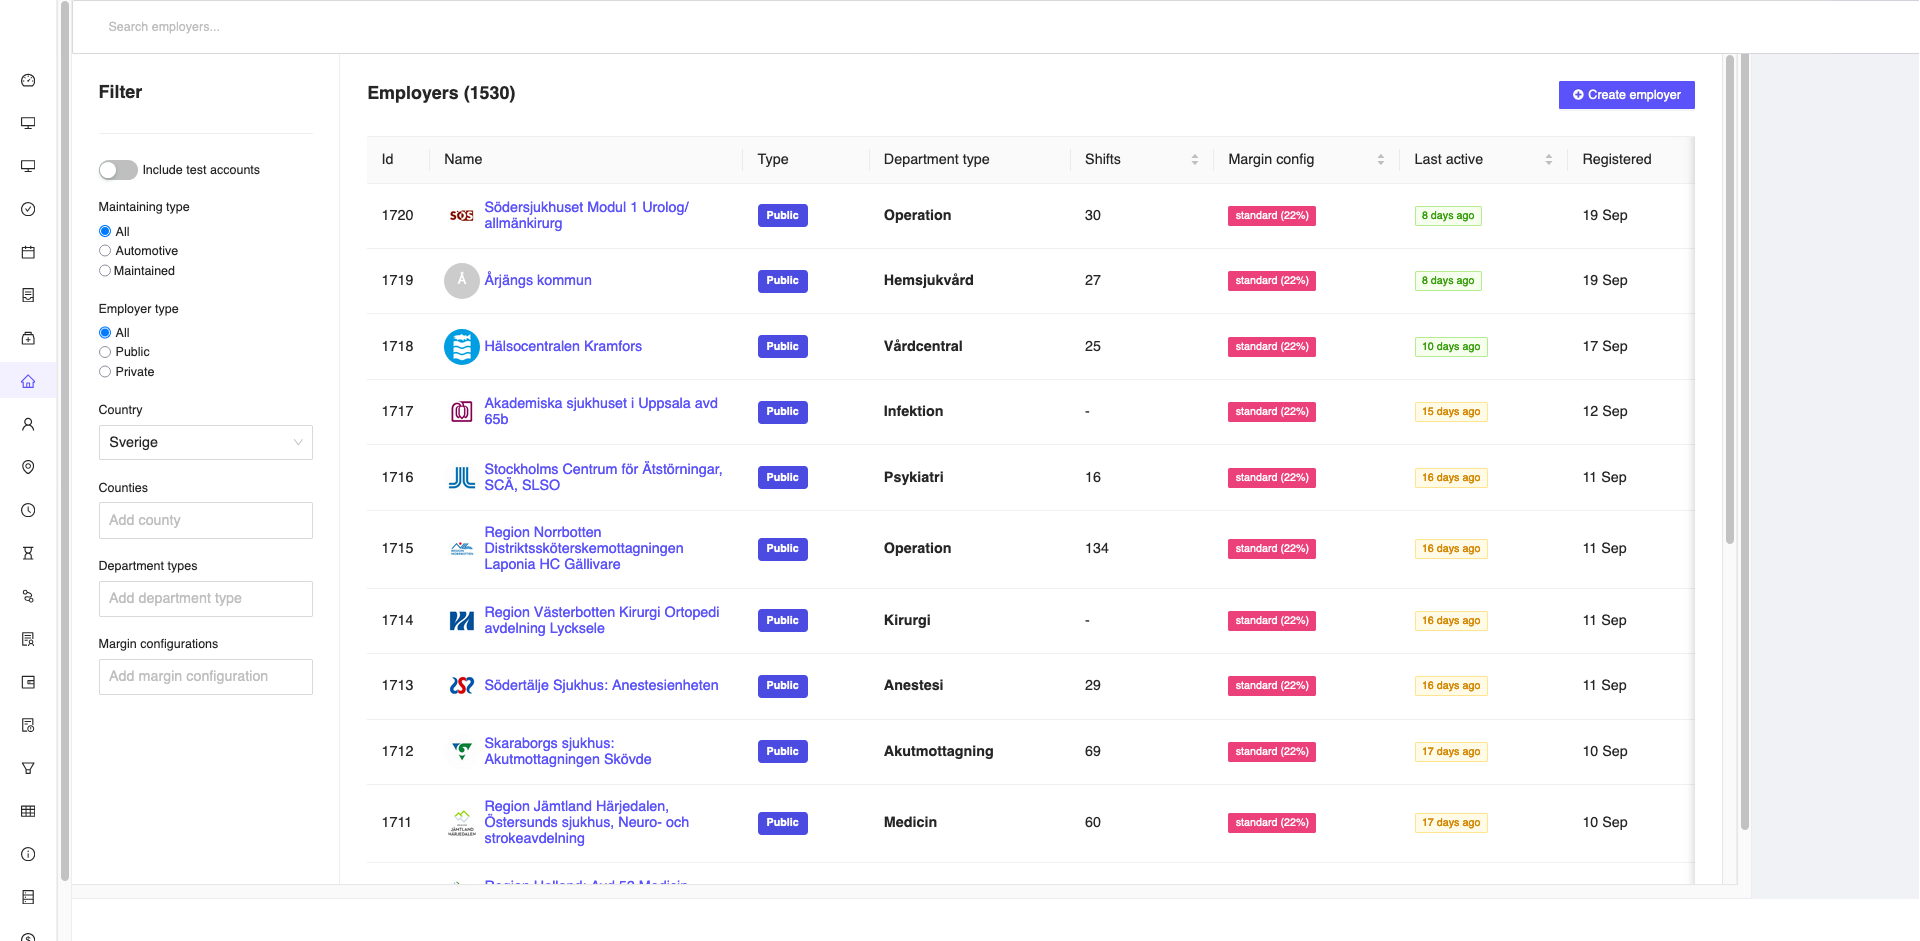
Figure 1: Employer Page
Create Employer
As part of the onboarding process, once the employer agrees to the terms and conditions, the admin user will create the employer account by clicking on the Create Employer button in the Uppdragsgivare sidebar menu, as shown in the figure below.
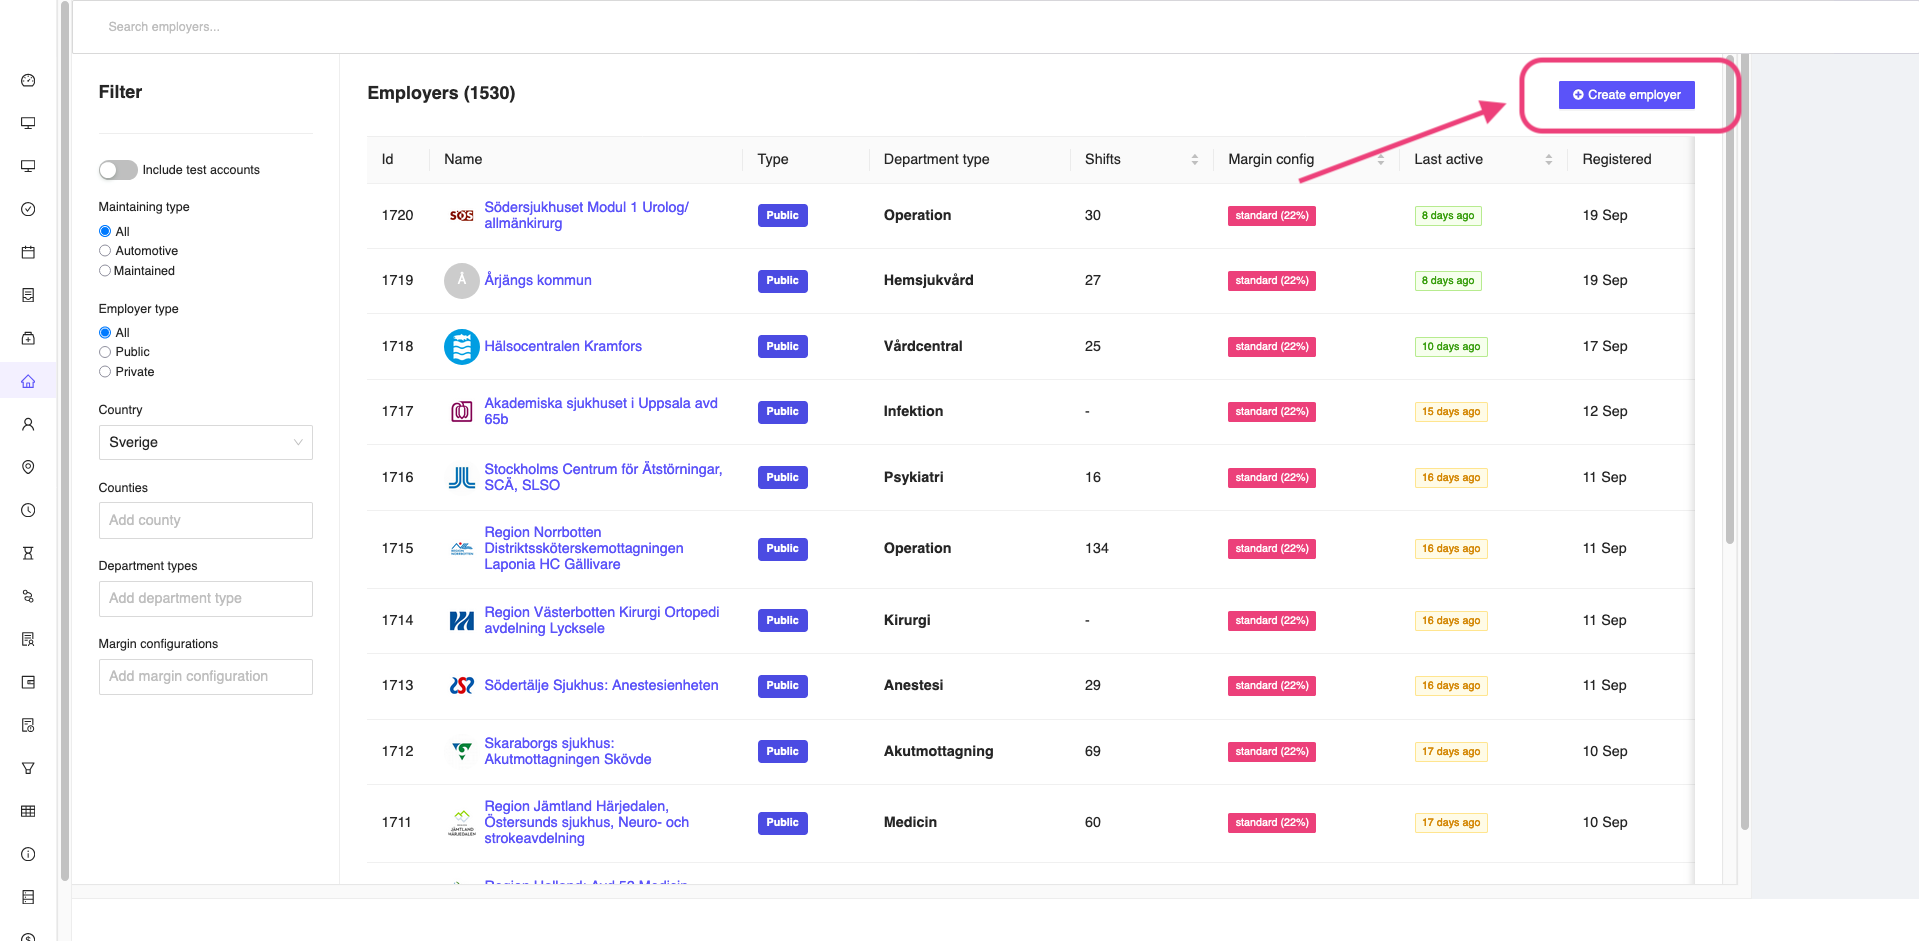
Figure 2: Create new employer button
Once you click on the Create Employer button, you will be redirected to the Create Employer page where you can enter the employer details and save them.
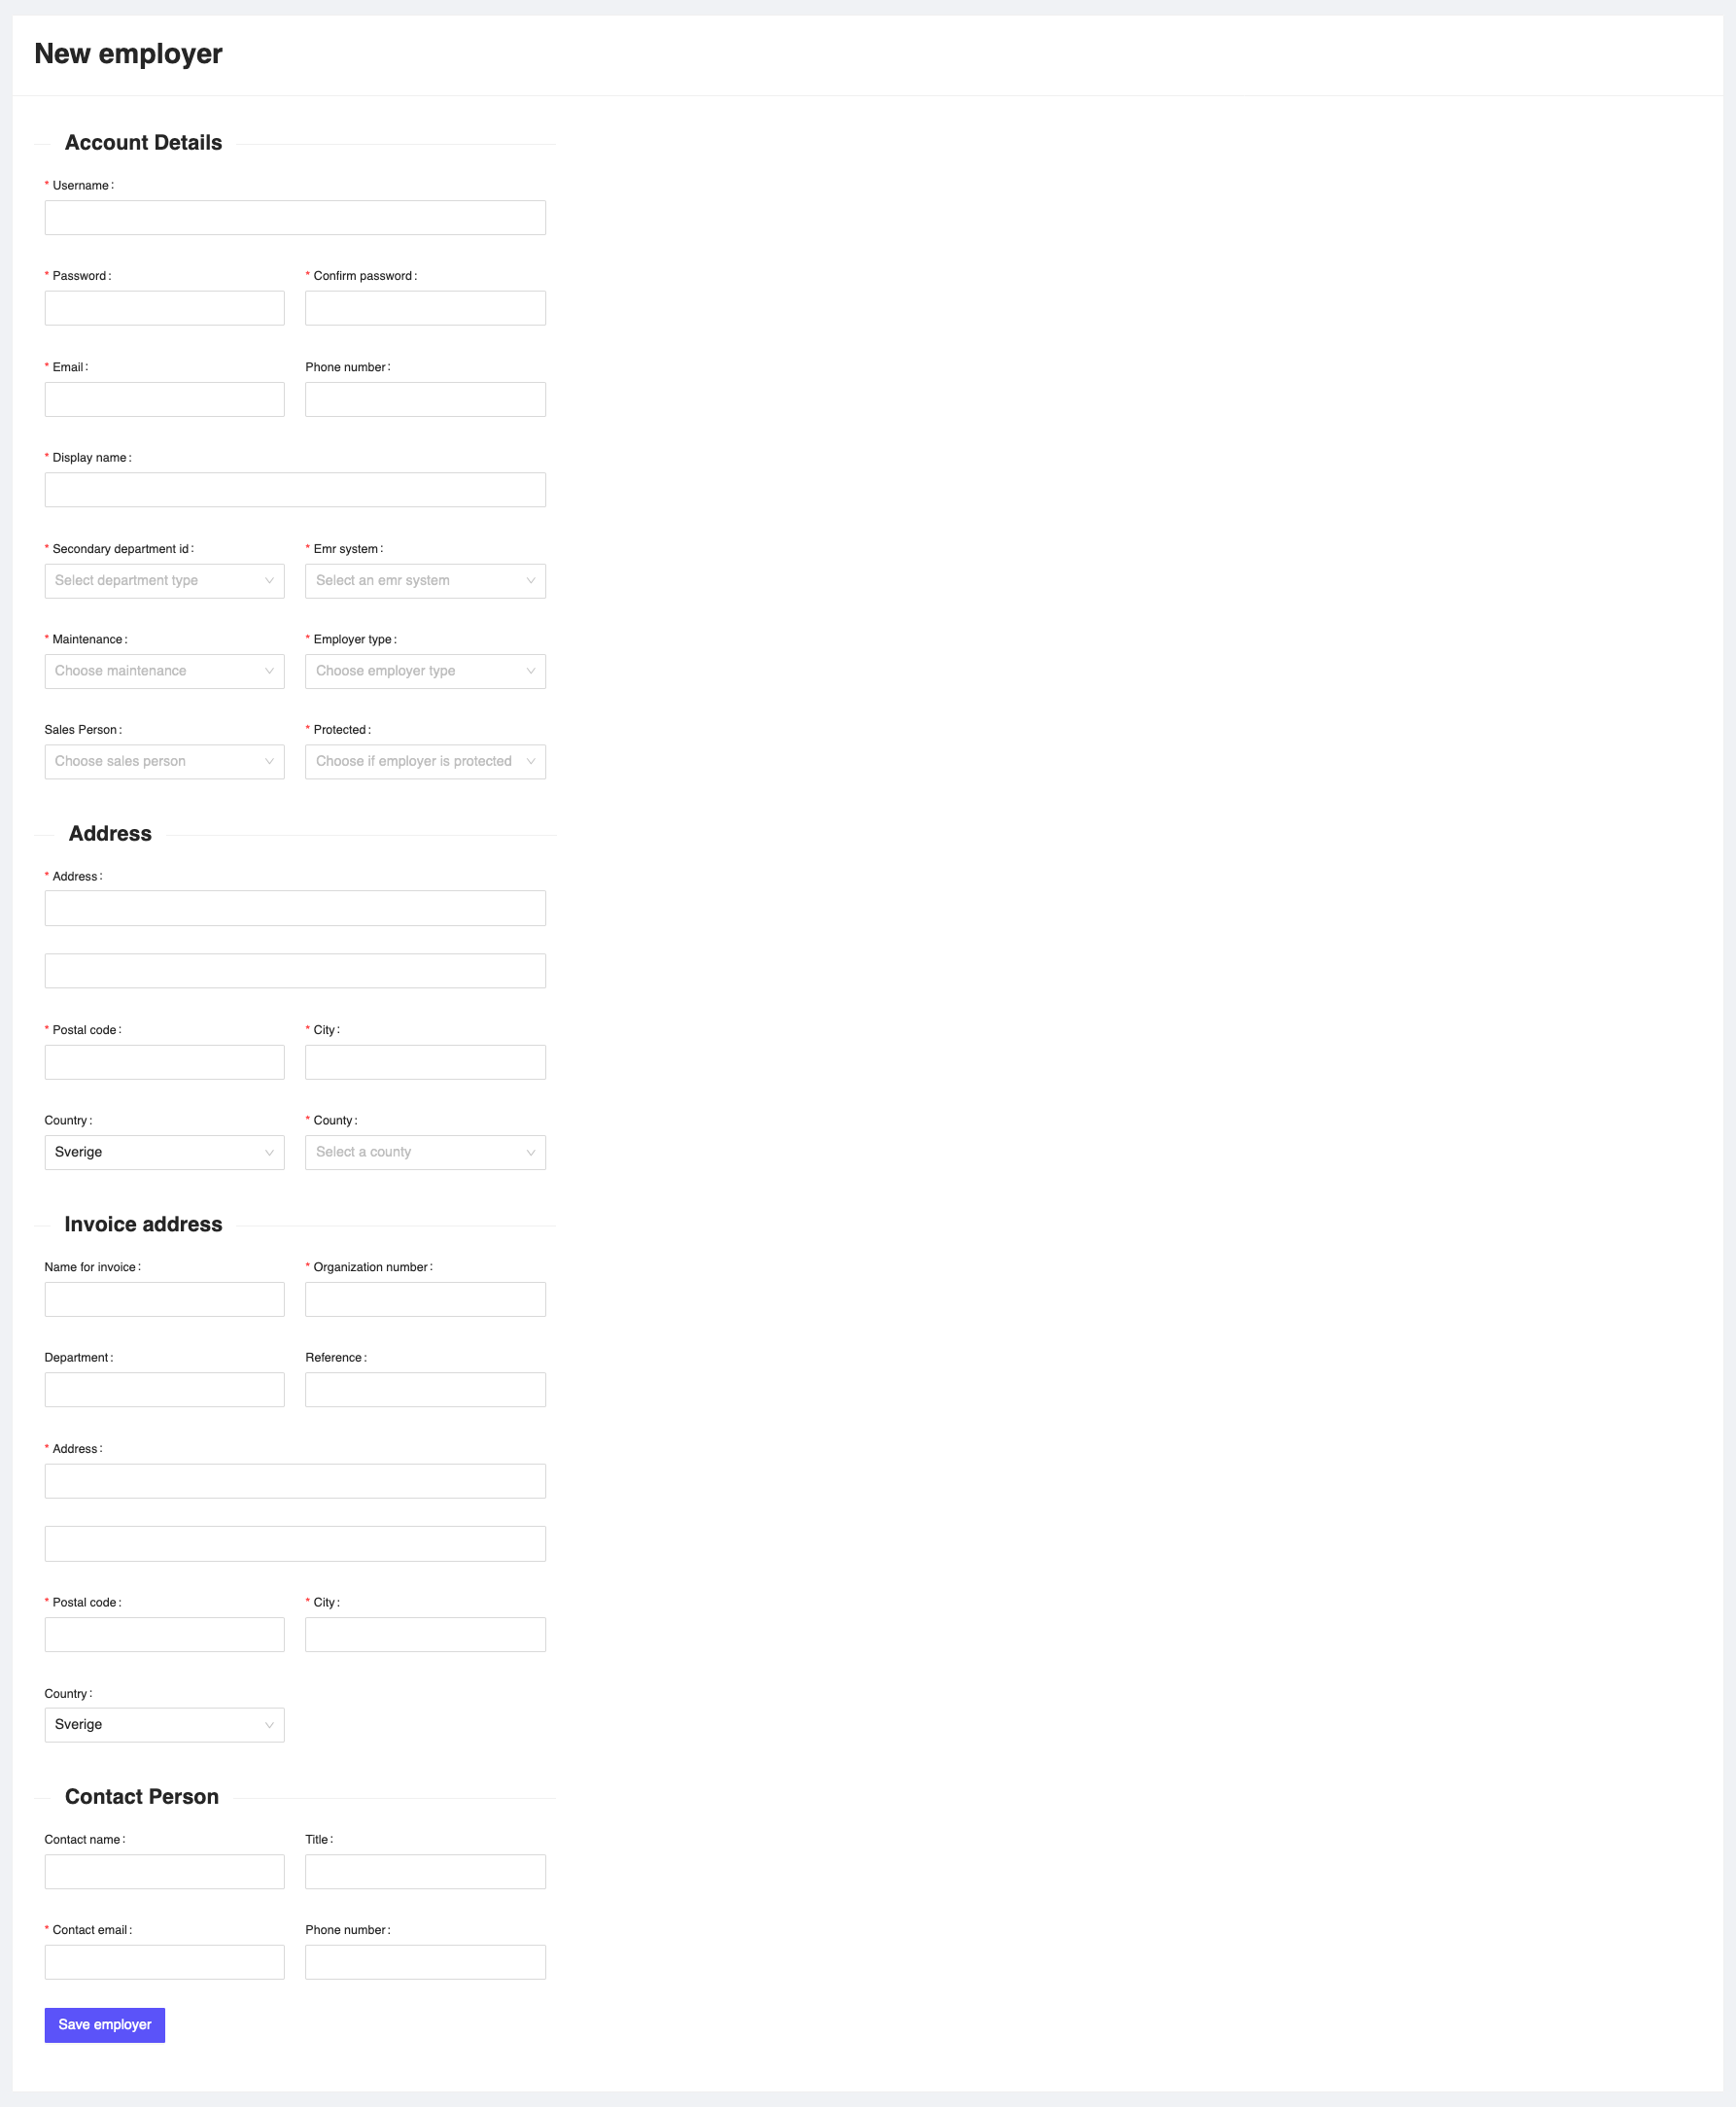
Figure 3: Create Employer Page
Details to be entered while creating the employer
-
Username: The username of the employer. This should be a unique username and is used for login purposes, not the display name.
-
Password: The password of the employer. This should be a strong password.
-
Email: The email of the employer. This should be a valid email address.
-
Phone number: The phone number of the employer. This should be a valid phone number.
-
Display name: The display name of the employer. This will be displayed in the system publicly as well as in the mobile applications.
-
Secondary department ID: The department ID of the employer. You can choose the department from the dropdown list.
-
EMR system: The EMR system of the employer. You can choose the EMR system from the dropdown list.
-
Maintenance: The maintenance status of the employer. Choose
Automotiveif the employer is a private employer responsible for the maintenance of the system. ChooseMaintainedif the employer is a public employer, as the maintenance will be taken care of by theMedpeopleteam. -
Employer type: The type of the employer. You can choose the employer type from the dropdown list. Options include:
PrivatePublic
This is provided since you have the option to choose the maintenance status of the employer in certain cases, where public employers are maintained by themselves (e.g., in the case of a Municipality). Please read this in detail from the introduction page, Introduction.
-
Sales Person: The sales person of the employer. This is an optional field. You can choose the sales person from the dropdown list.
-
Protected: The protected status of the employer. Choose
Protectedif the employer is a protected employer, i.e., the details of the employer should be hidden from the mobile applications. Even the name of the employer will be hidden, and you will see something like "Health care provider created" instead of the original name. ChooseNot Protectedif the employer is not a protected employer and can be viewed by anyone in the mobile applications. -
Address: The address of the employer. This should be a valid address. All fields are mandatory.
-
Invoice address: The invoice address of the employer. This should be a valid address. All fields are mandatory.
-
Contact person: The contact person of the employer. This should be a valid name with the required title, email, and phone number. Only the email is mandatory.
Once you enter all the details, click on the Save button to save the employer details. If you want to cancel the operation, click on the Cancel button.
View Employer
Once you create an employer, you can view the employer details by clicking on the relevant employer from the list of employers.
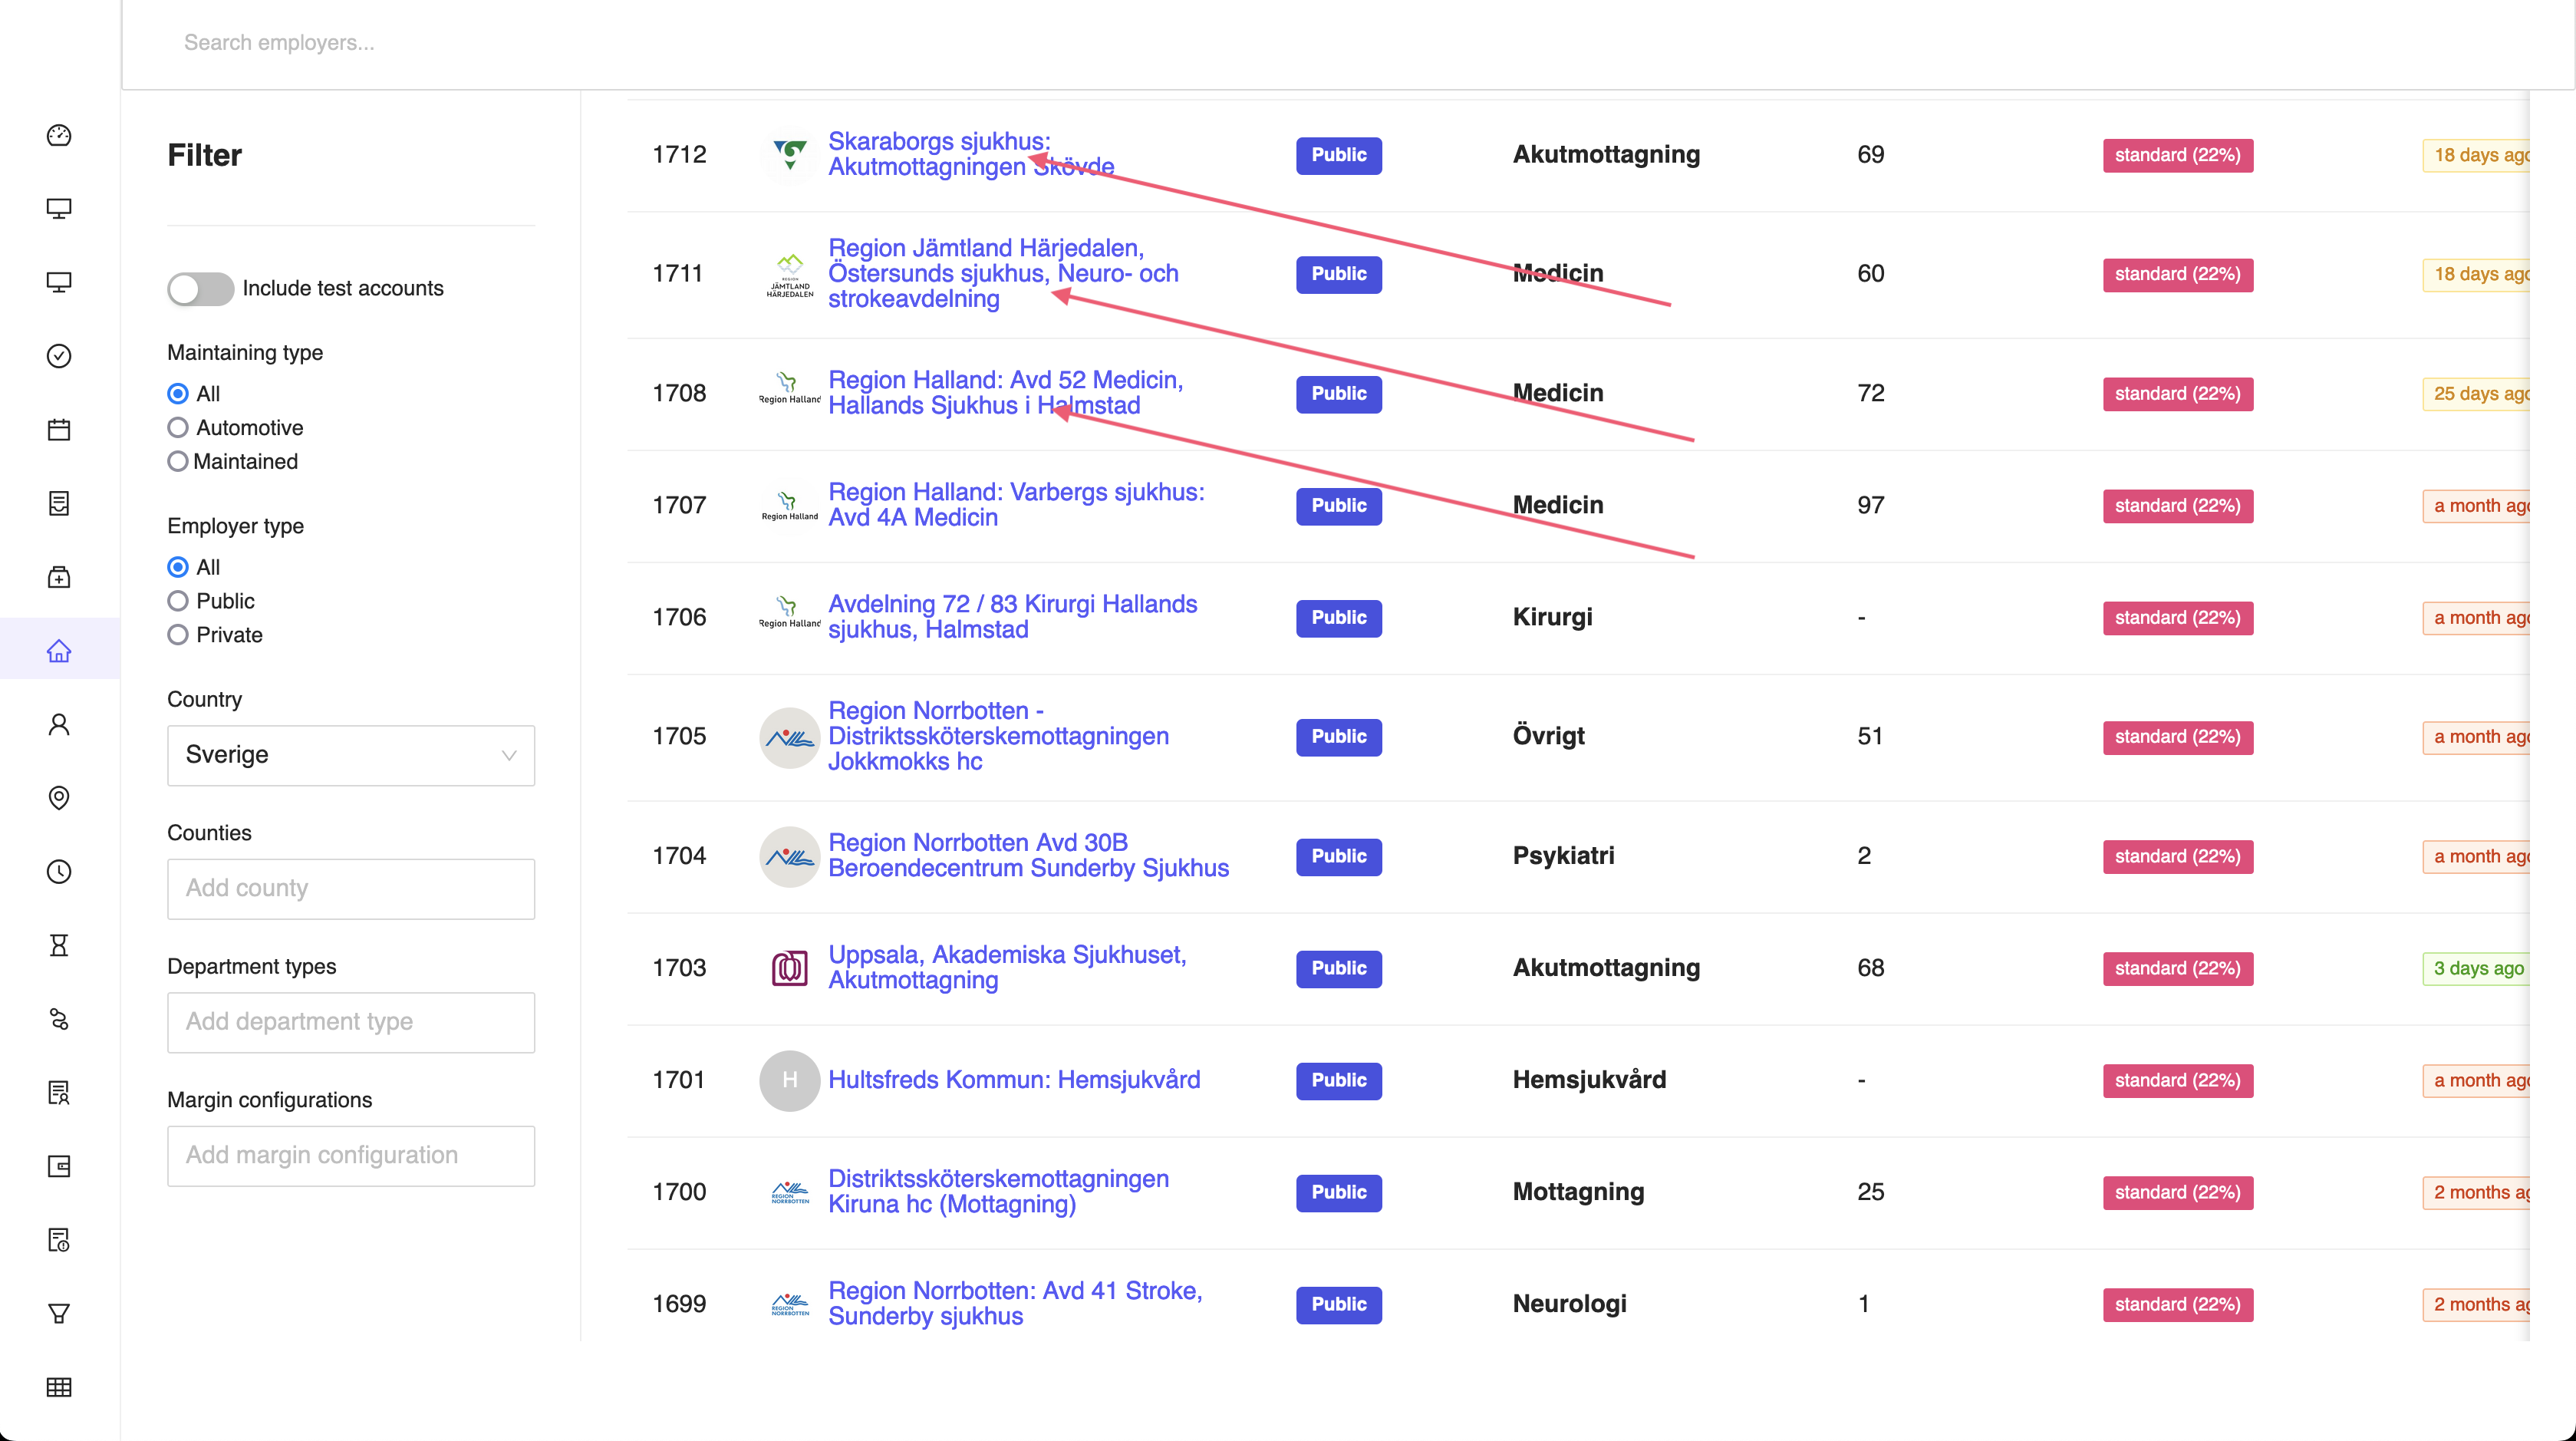
Figure 4: Employer List
The employer ID is a unique identifier for the employer in the system. This can be seen in the address bar, which is the URL of the employer page.
For example, if the URL is http://admin.medpeople.se/employers/1712, then the employer ID is 1712.
This is useful for the support team (development team) to identify the employer quickly.
Once you click on the employer, you will be redirected to the employer details page where you can view and edit the employer details as required.
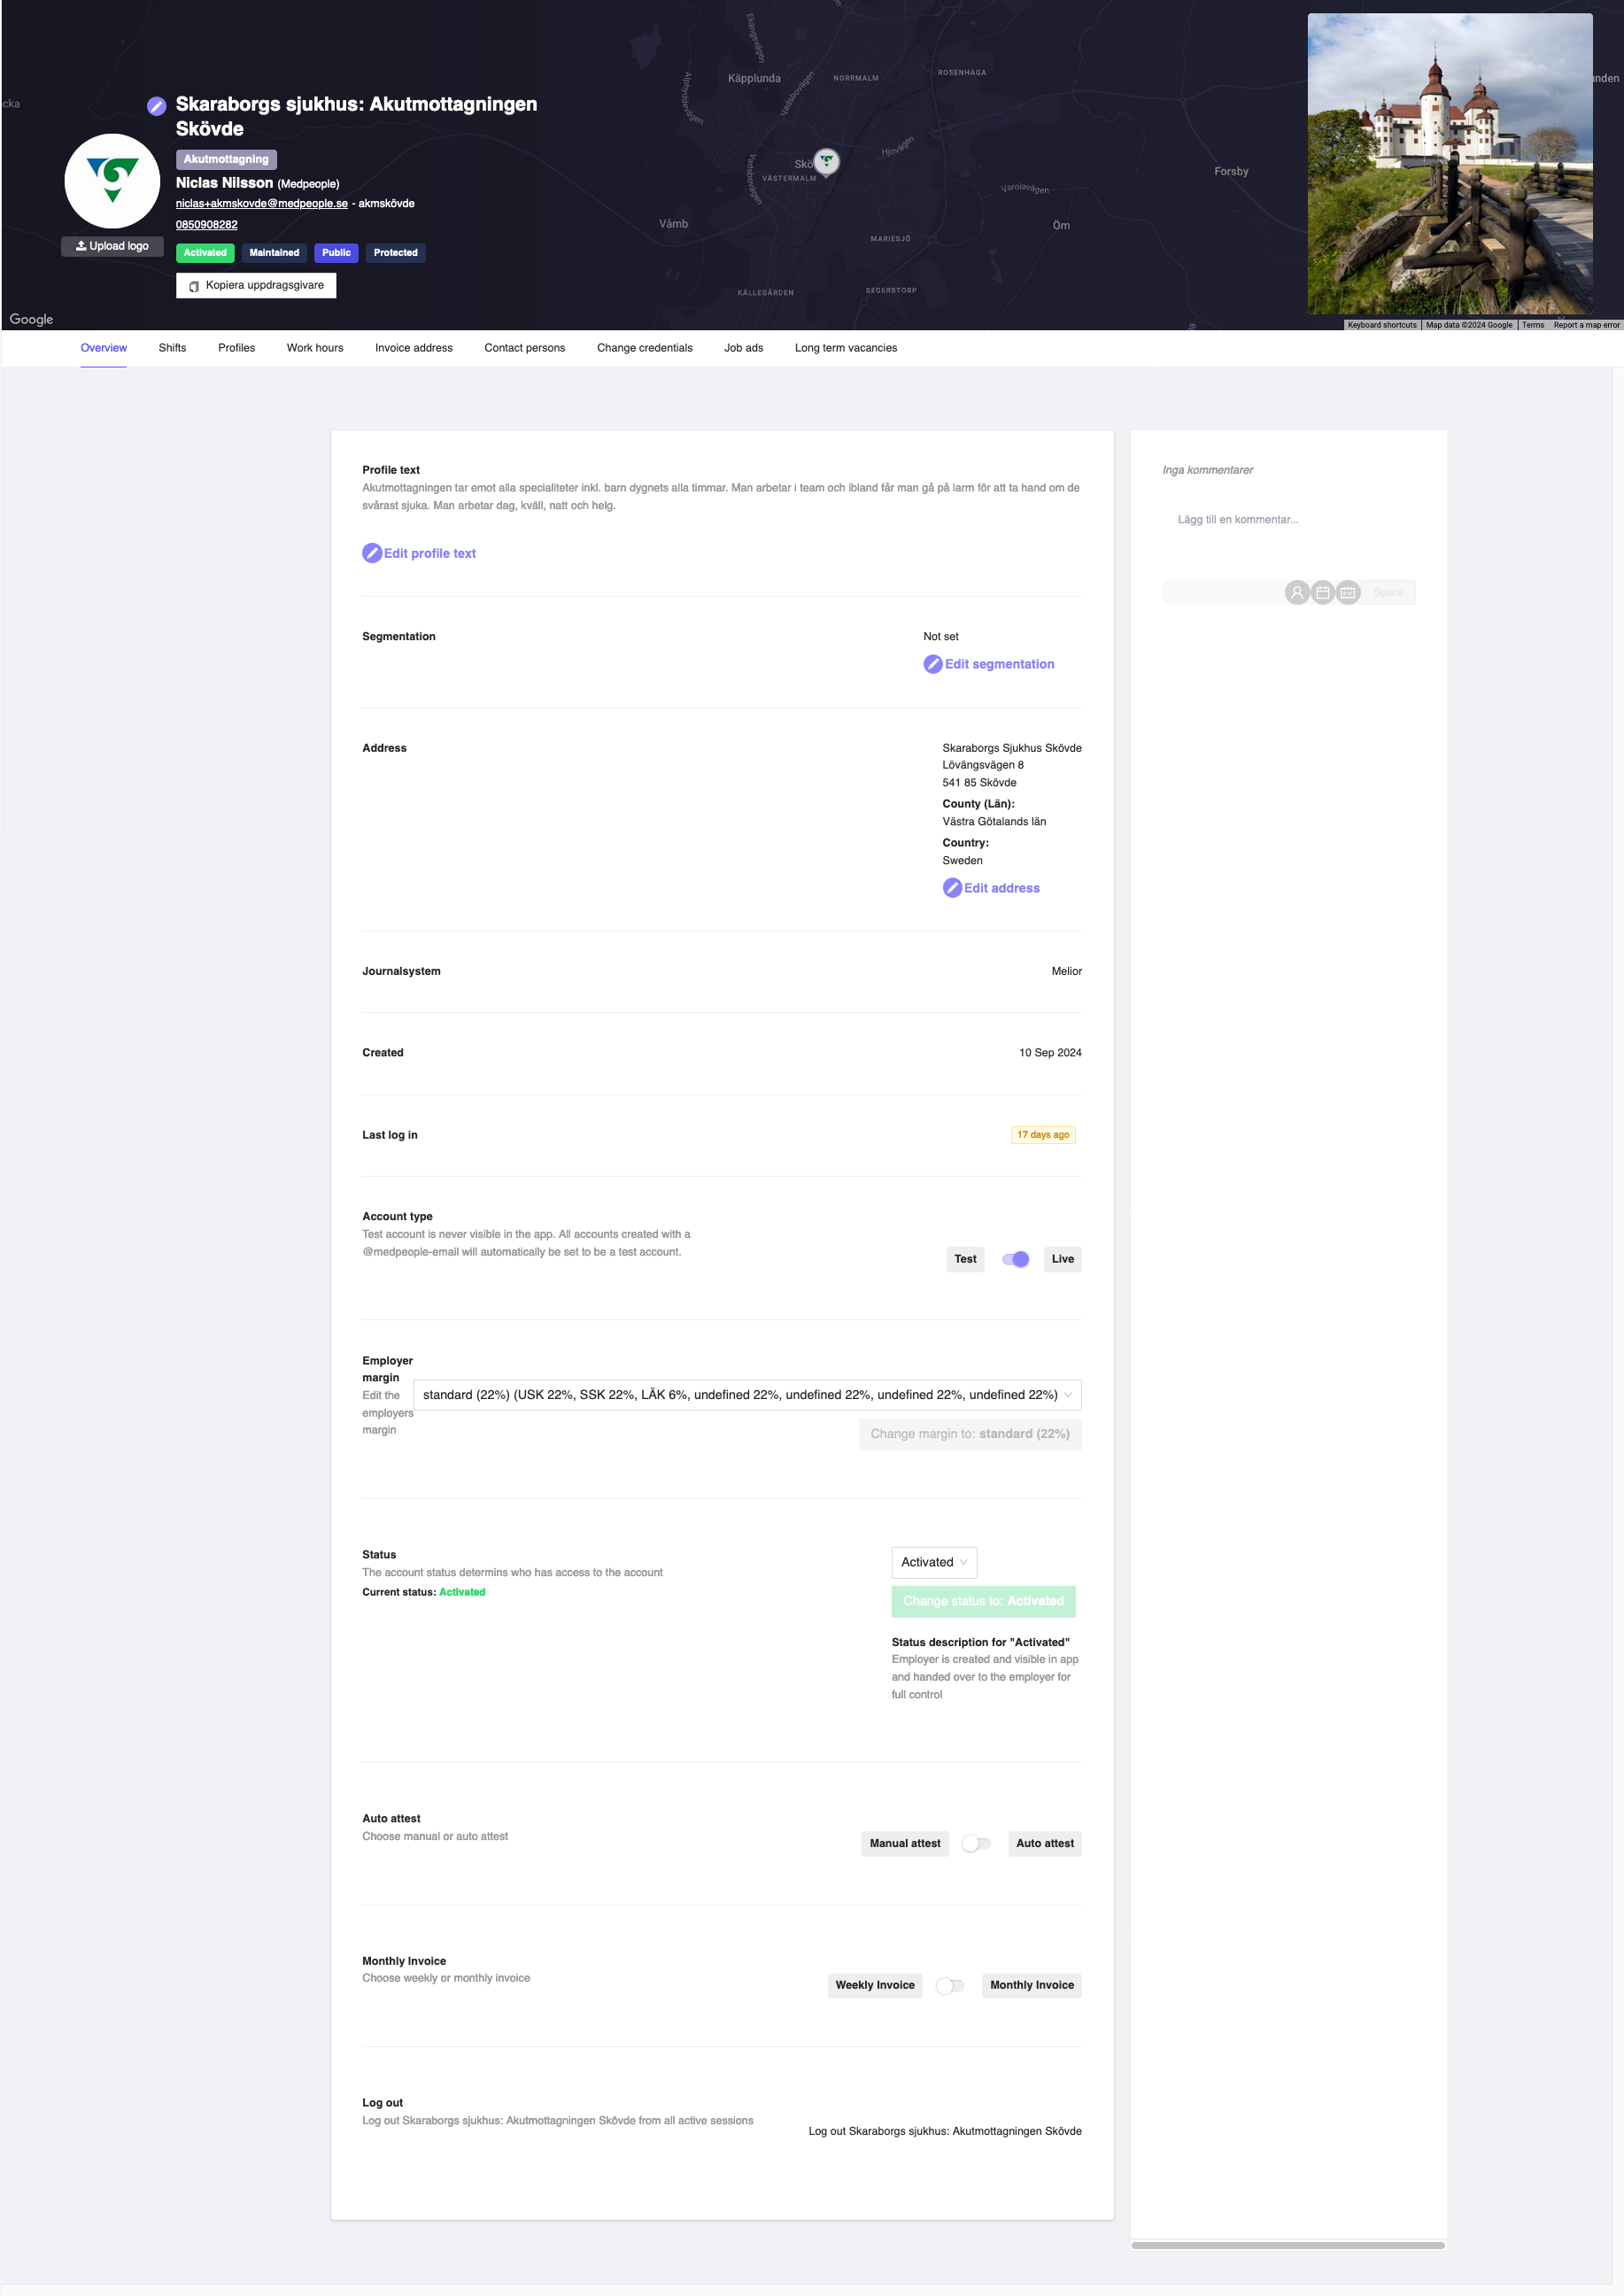
Figure 5: View Employer Details Page
Edit Employer
On the employer details page, you can edit the general details of the employer. This includes the employer logo, employer name, employer types, etc.
Add/Edit employer profile logo
You can add/edit the profile logo of the employer. This is the logo that will be displayed in the mobile applications as well as in the employer applications.
Figure 6: Edit employer logo
Edit employer profile details
You can click on the edit icon on the top of the employer logo to edit the employer details.
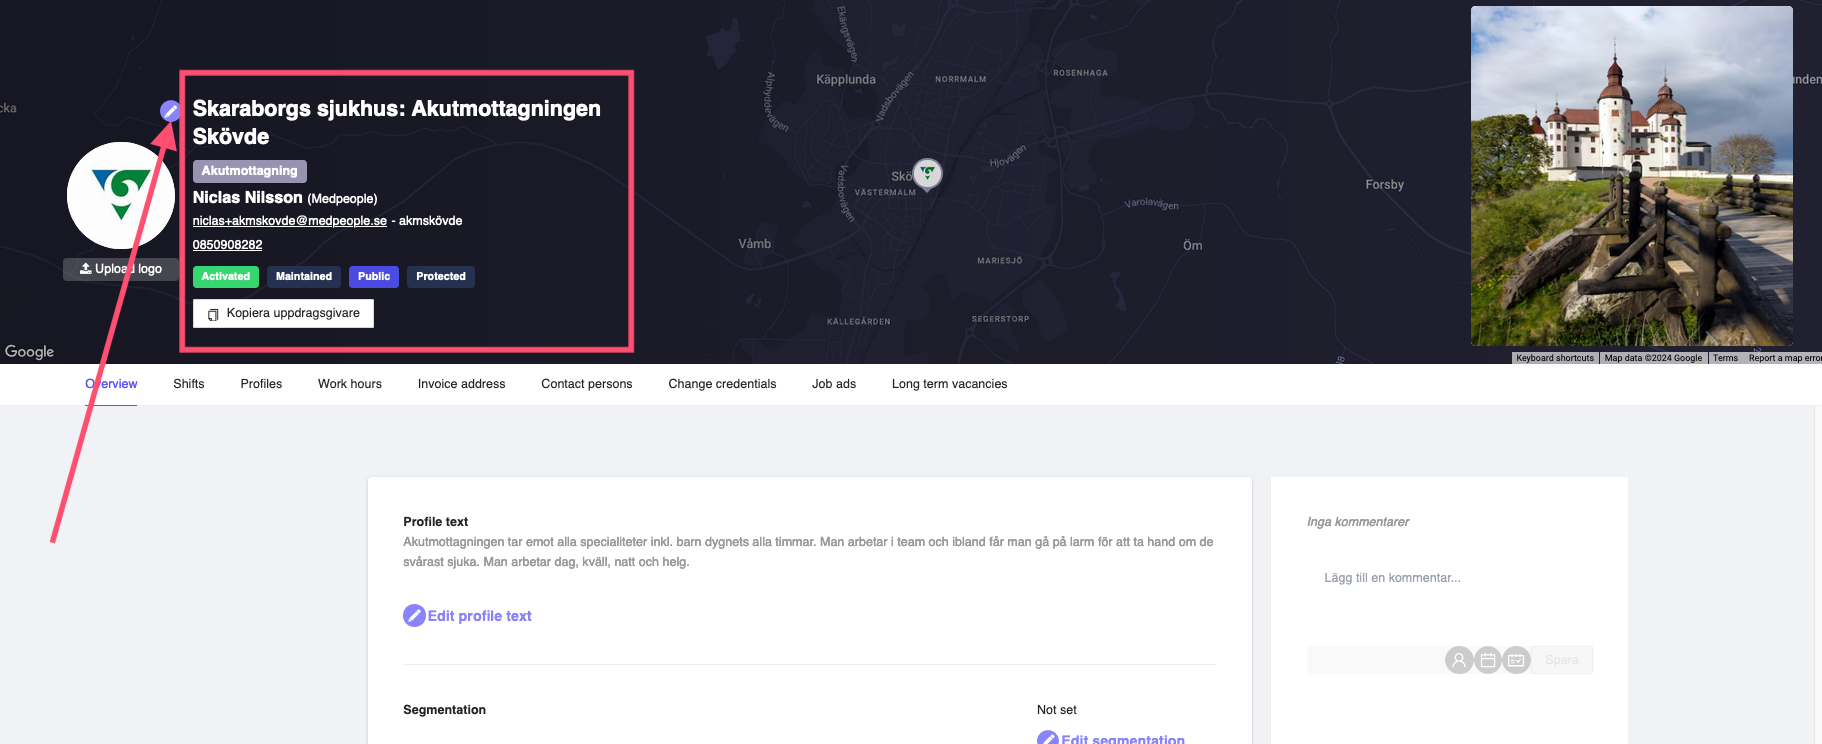
Figure 7: Edit employer profile details
You can edit all the information that you provided while creating the employer. Once you make the changes, click on the Save button to save the changes. If you want to cancel the operation, click on the X button on the top right corner.
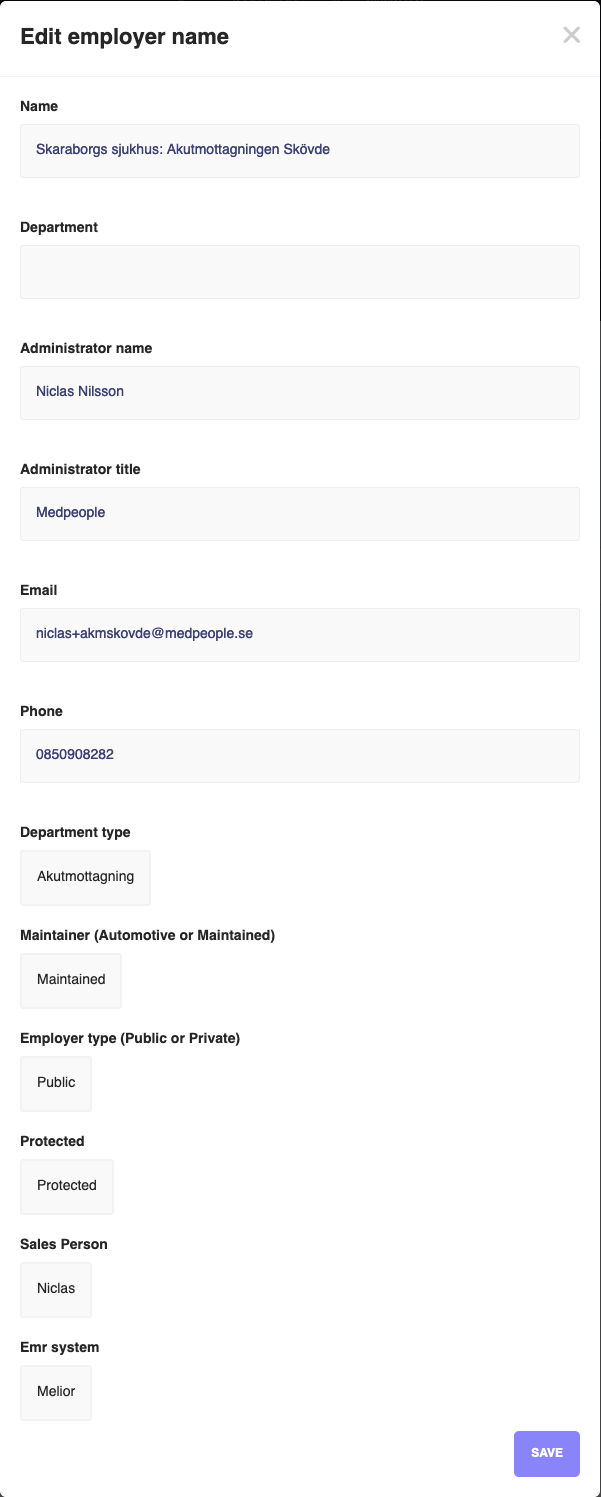
Figure 8: Edit employer profile details
Add/Edit employer profile image
You can also add/edit the profile image of the employer. This is the image that will be displayed in the mobile applications as well as in the employer applications. Generally, this will be the building image of the employer.
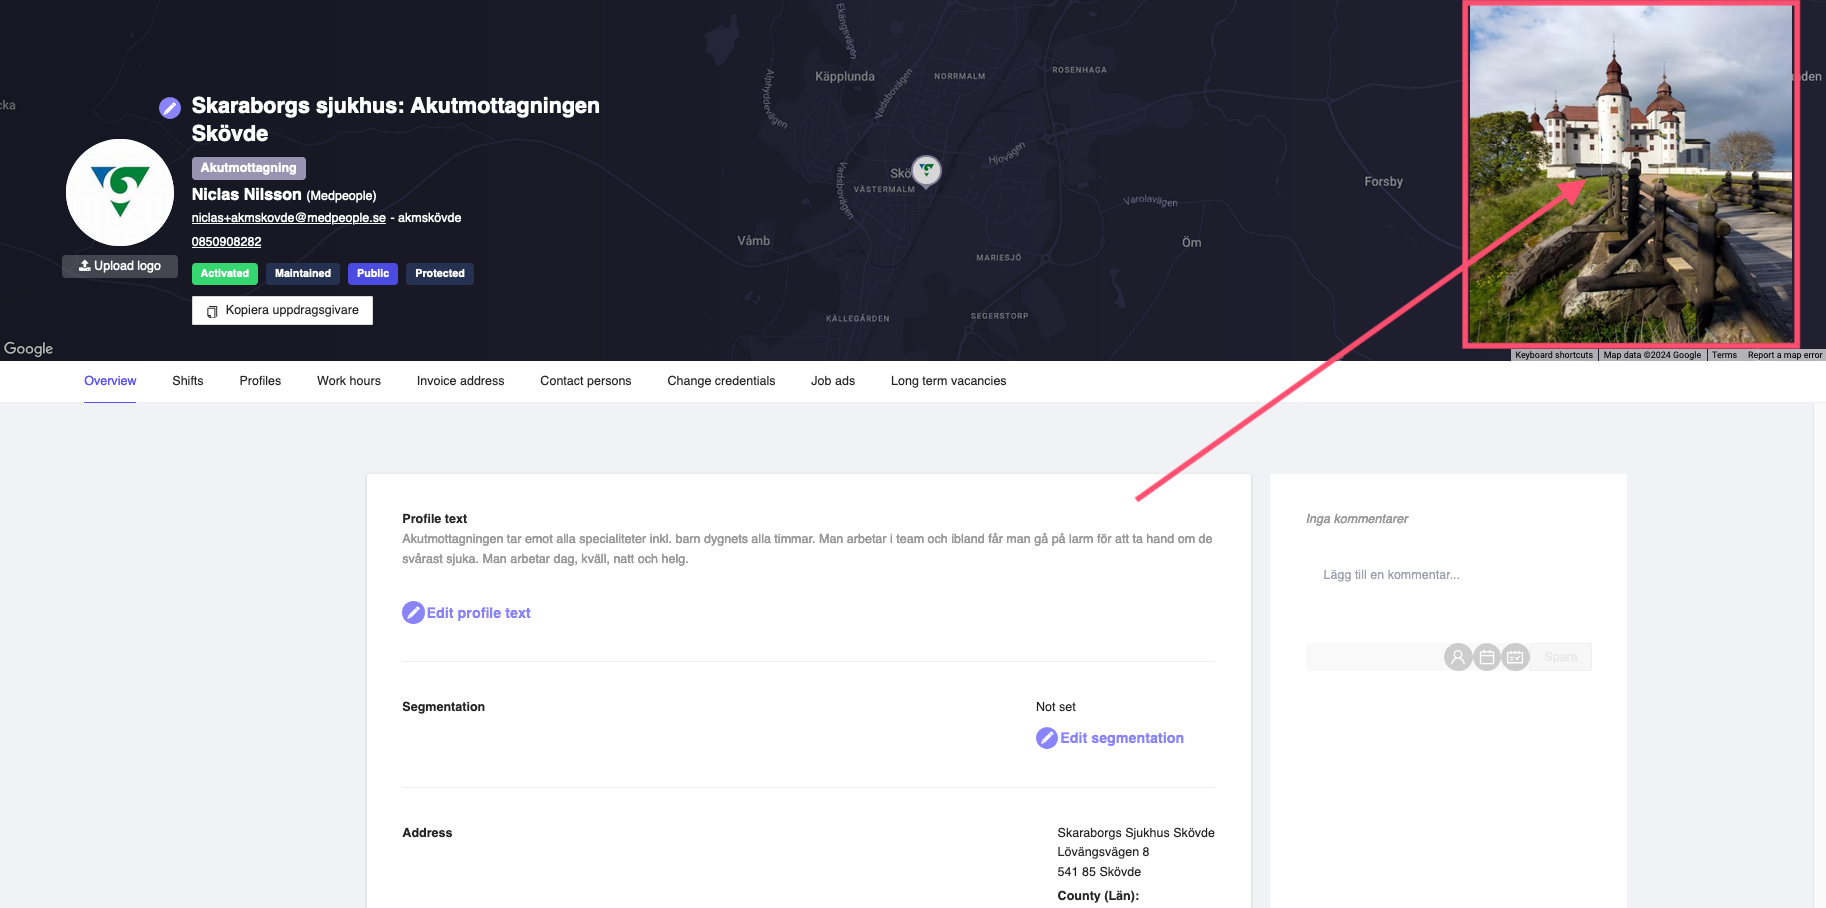
Figure 9: Edit employer profile image
Employer Tabs
On the employer details page, you have multiple tabs available for viewing various details of the employer.
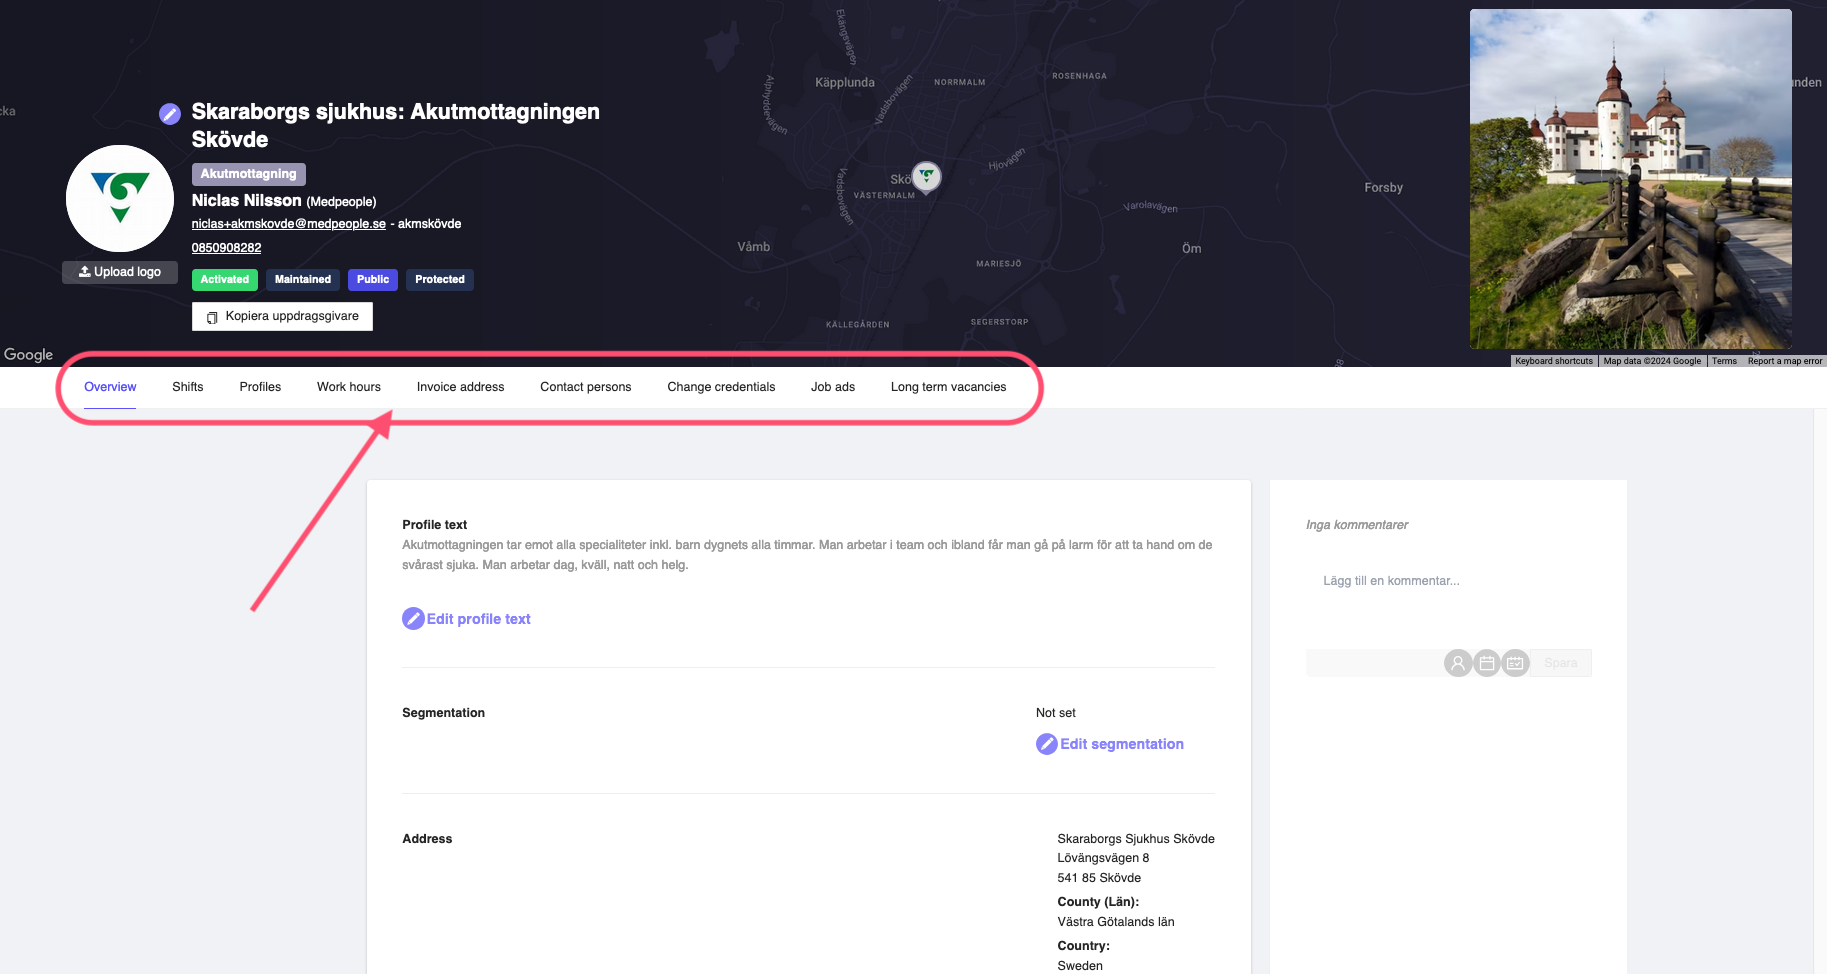
Figure 10: Employer tabs
You can learn about various tabs in the next sections.